Building a Wi-Fi connected kitchen scale (or coaster)
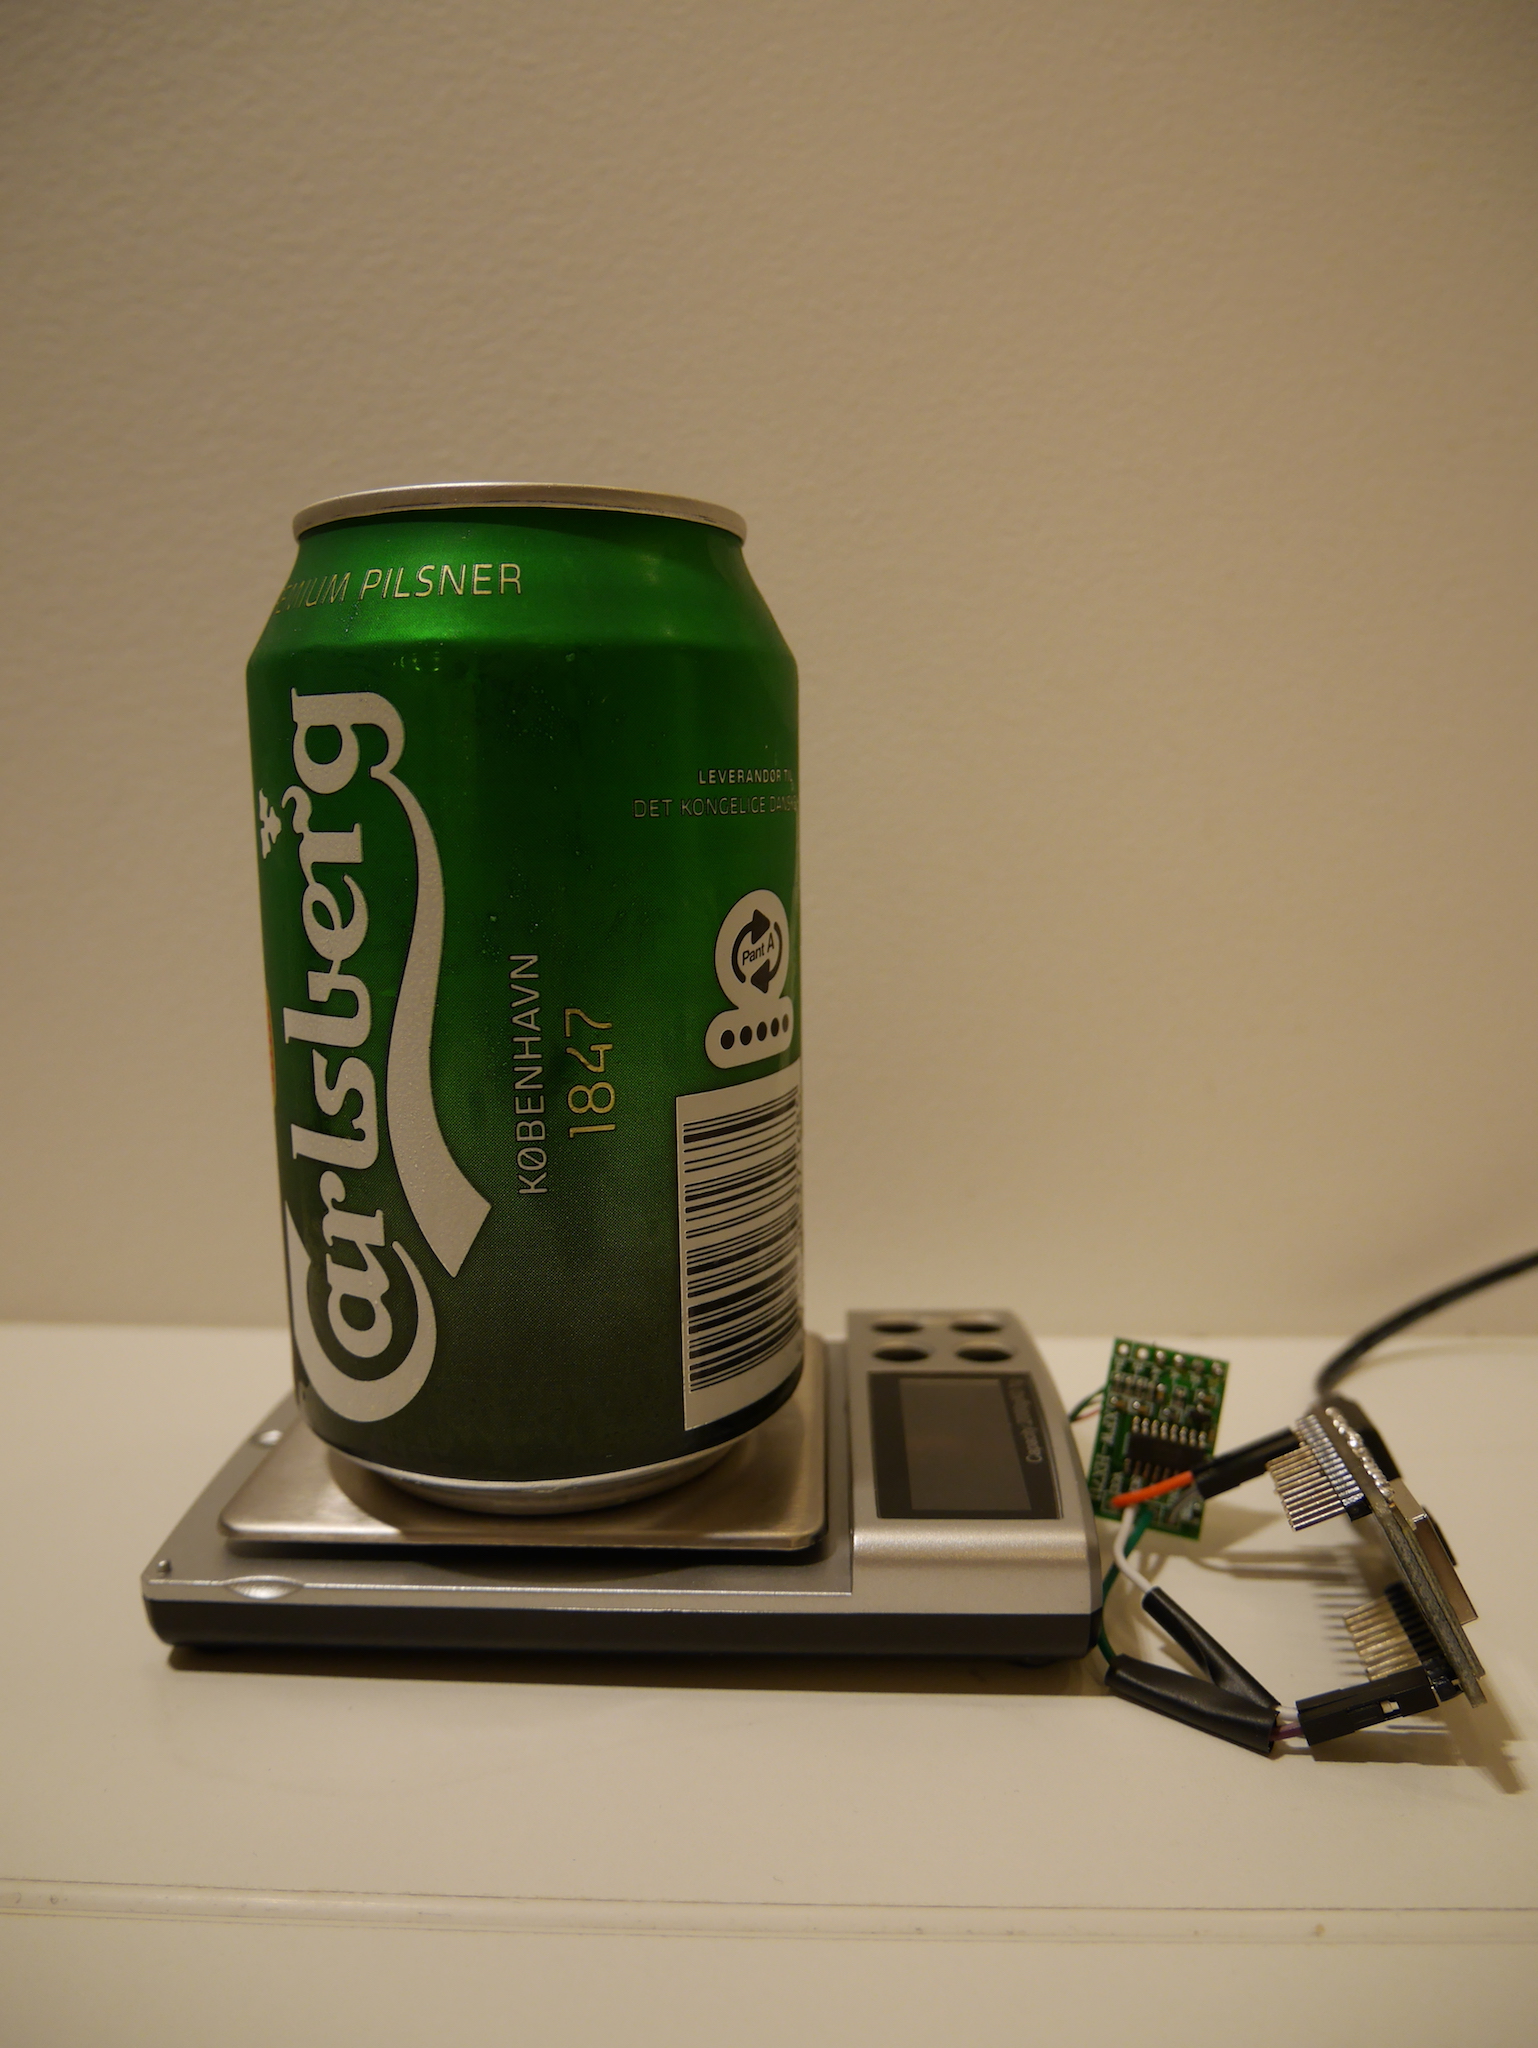
We built a Wi-Fi connected kitchen scale that can be used for measuring how much milk you have left in your fridge or, if you use it as a coaster, measure how fast you drink your beer.
In a previous post we shared our findings on what is inside two different ‘dumb’ kitchen scales currently available on the market. We disassembled them in order to find out whether the sensors they use can be easily bought from an electronics shop. What we learned is that in order to be able to measure weight we need one load cell bar, and this can be indeed be bought for around 7$ (depending on desired weight range and shop).
But also, in the process of disassembling the scales, we realized that we could try to hook our electronics to the scale and make use of the already glued metal surface on top of the load cell and the steady platform under the load cell. Otherwise, we could have 3D printed a custom case, but decided to leave that for phase 2 of our prototype.
The Initial Hardware
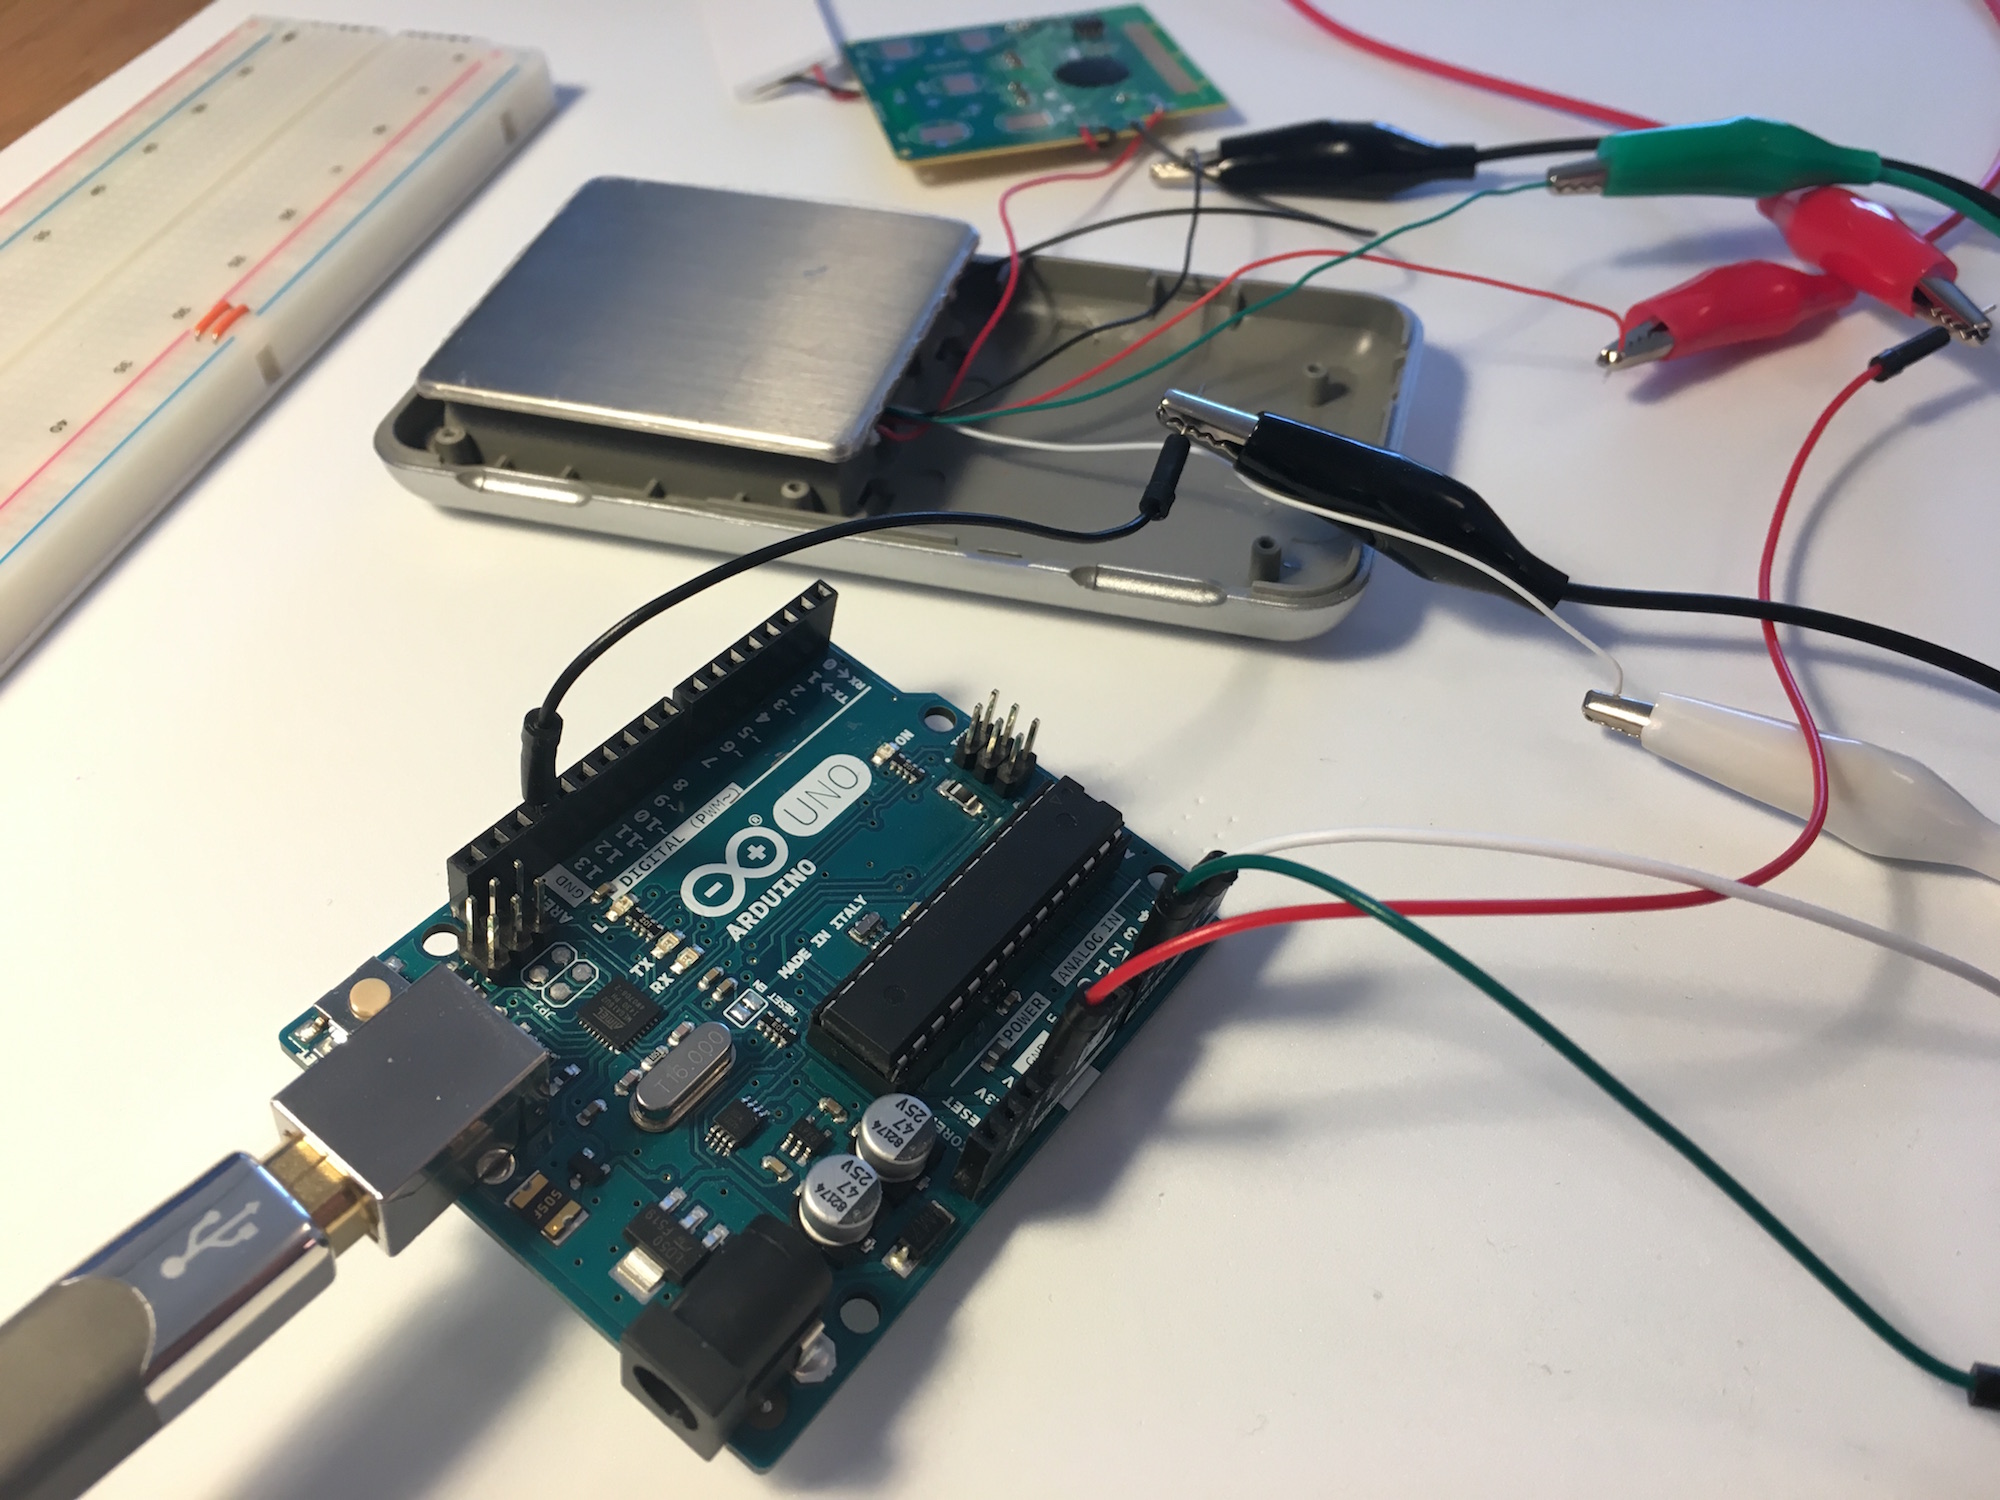 Our first try was to cut the 4 wires coming from the load cell to the scale’s PCB and try to connect these to an Arduino Uno. We tried to read the values from the white and green wires, while connecting the black wire to ground and red to 5V, but could not make any sense of the values.
We quickly realized that we need an amplifier. We ordered some HX711 amplifier boards. It turns out they are pretty inexpensive (depends where you buy them from, but we could find them at 0.5$ per piece from AliExpress).
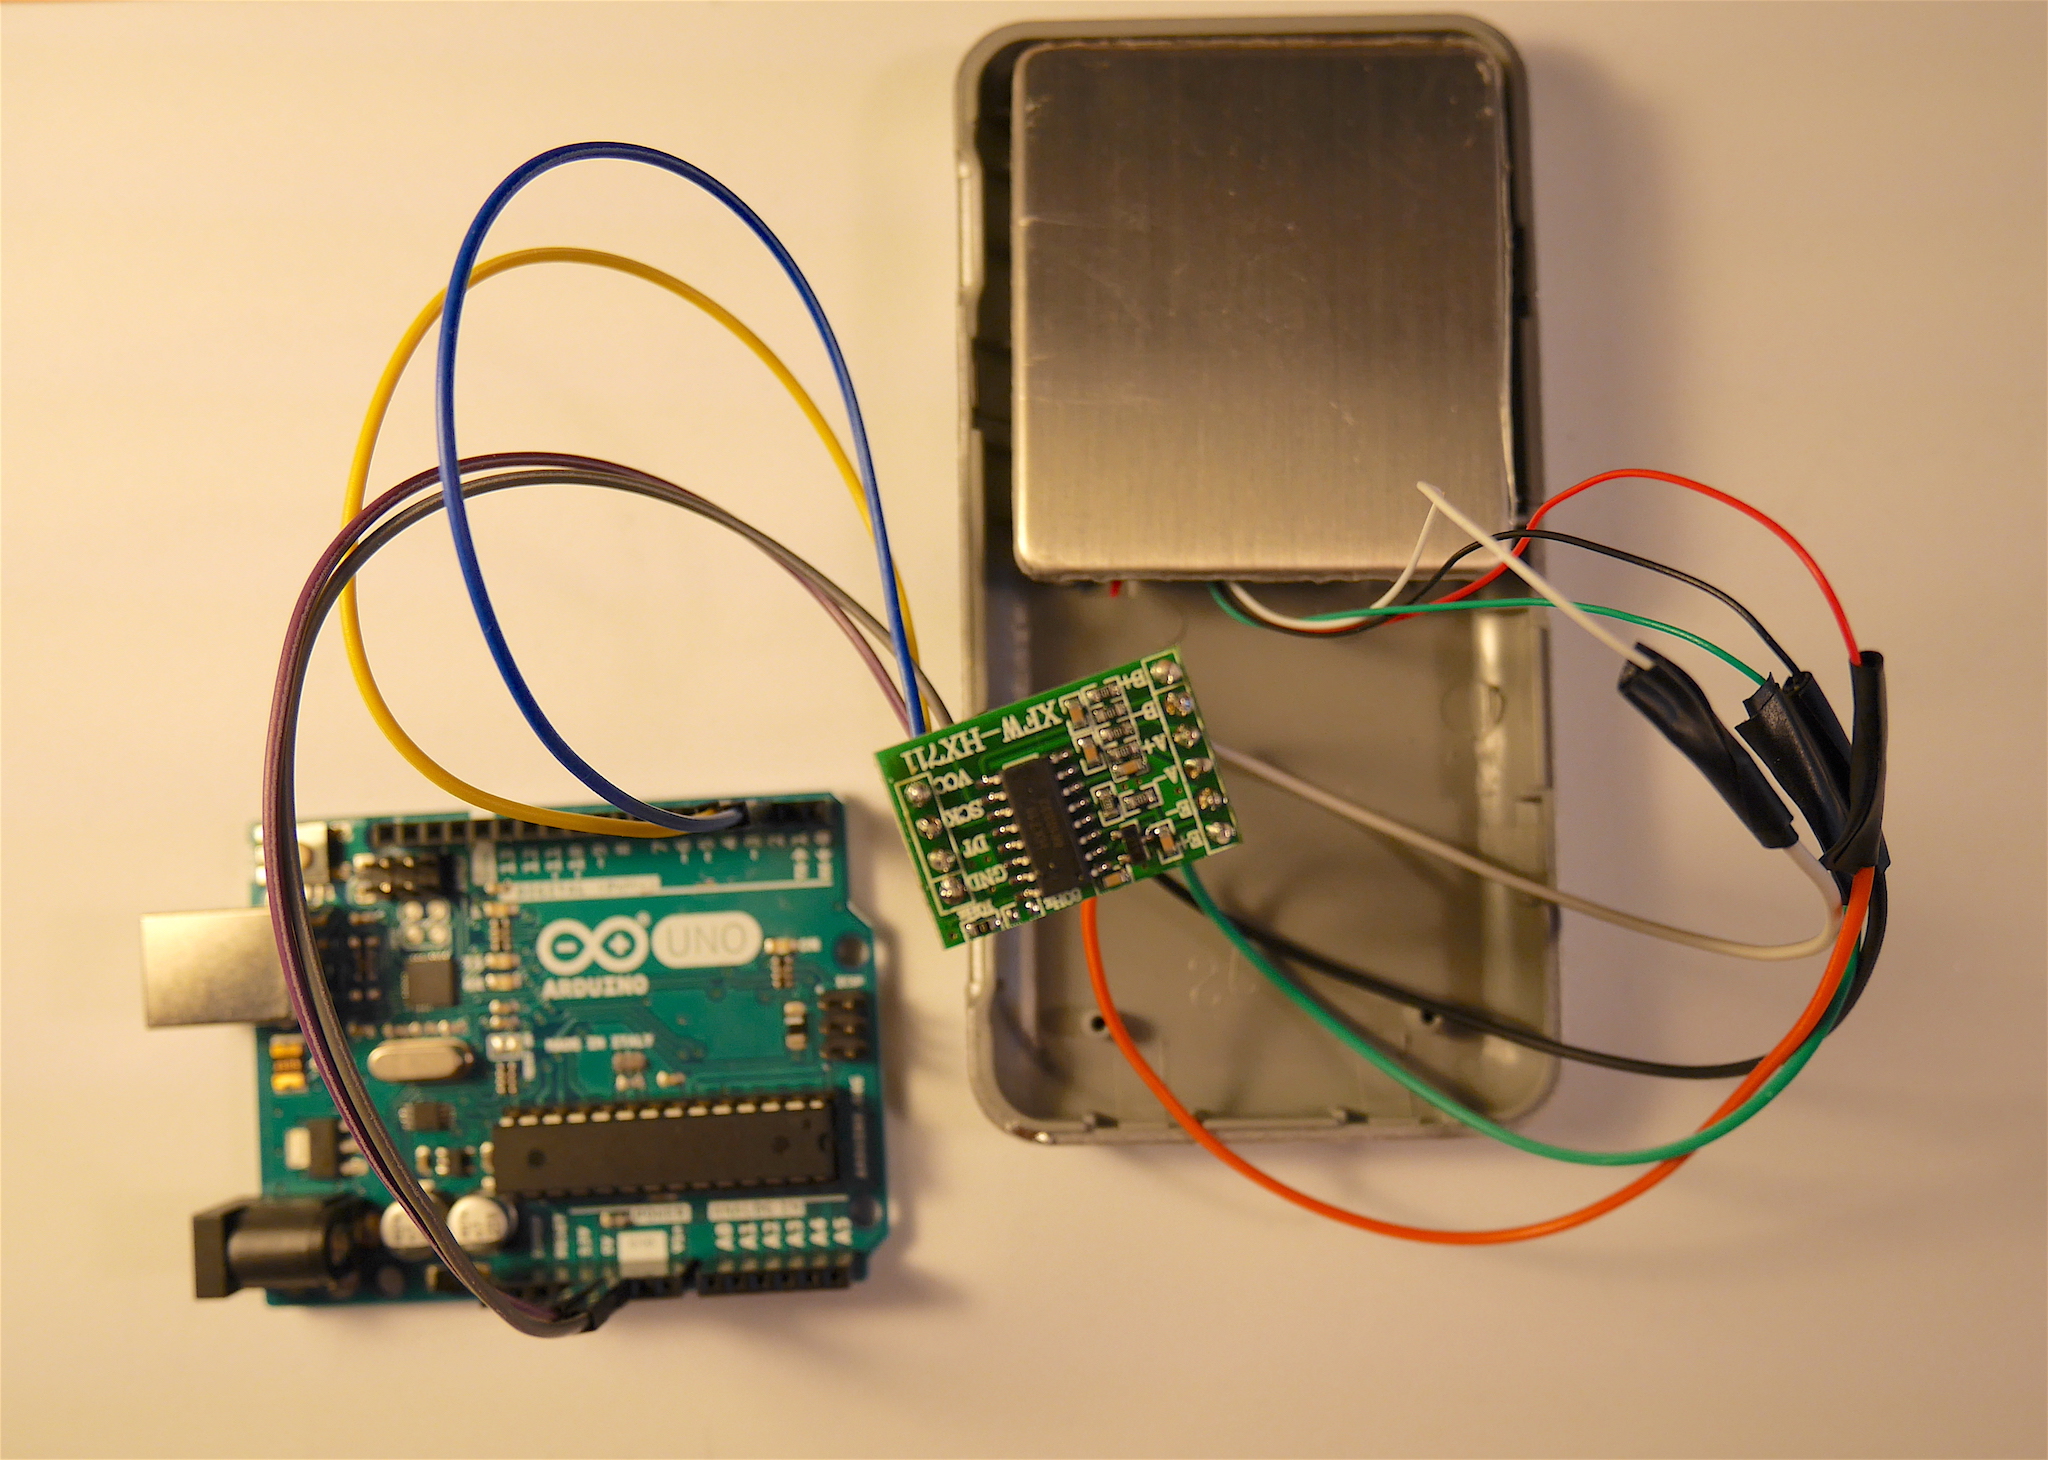
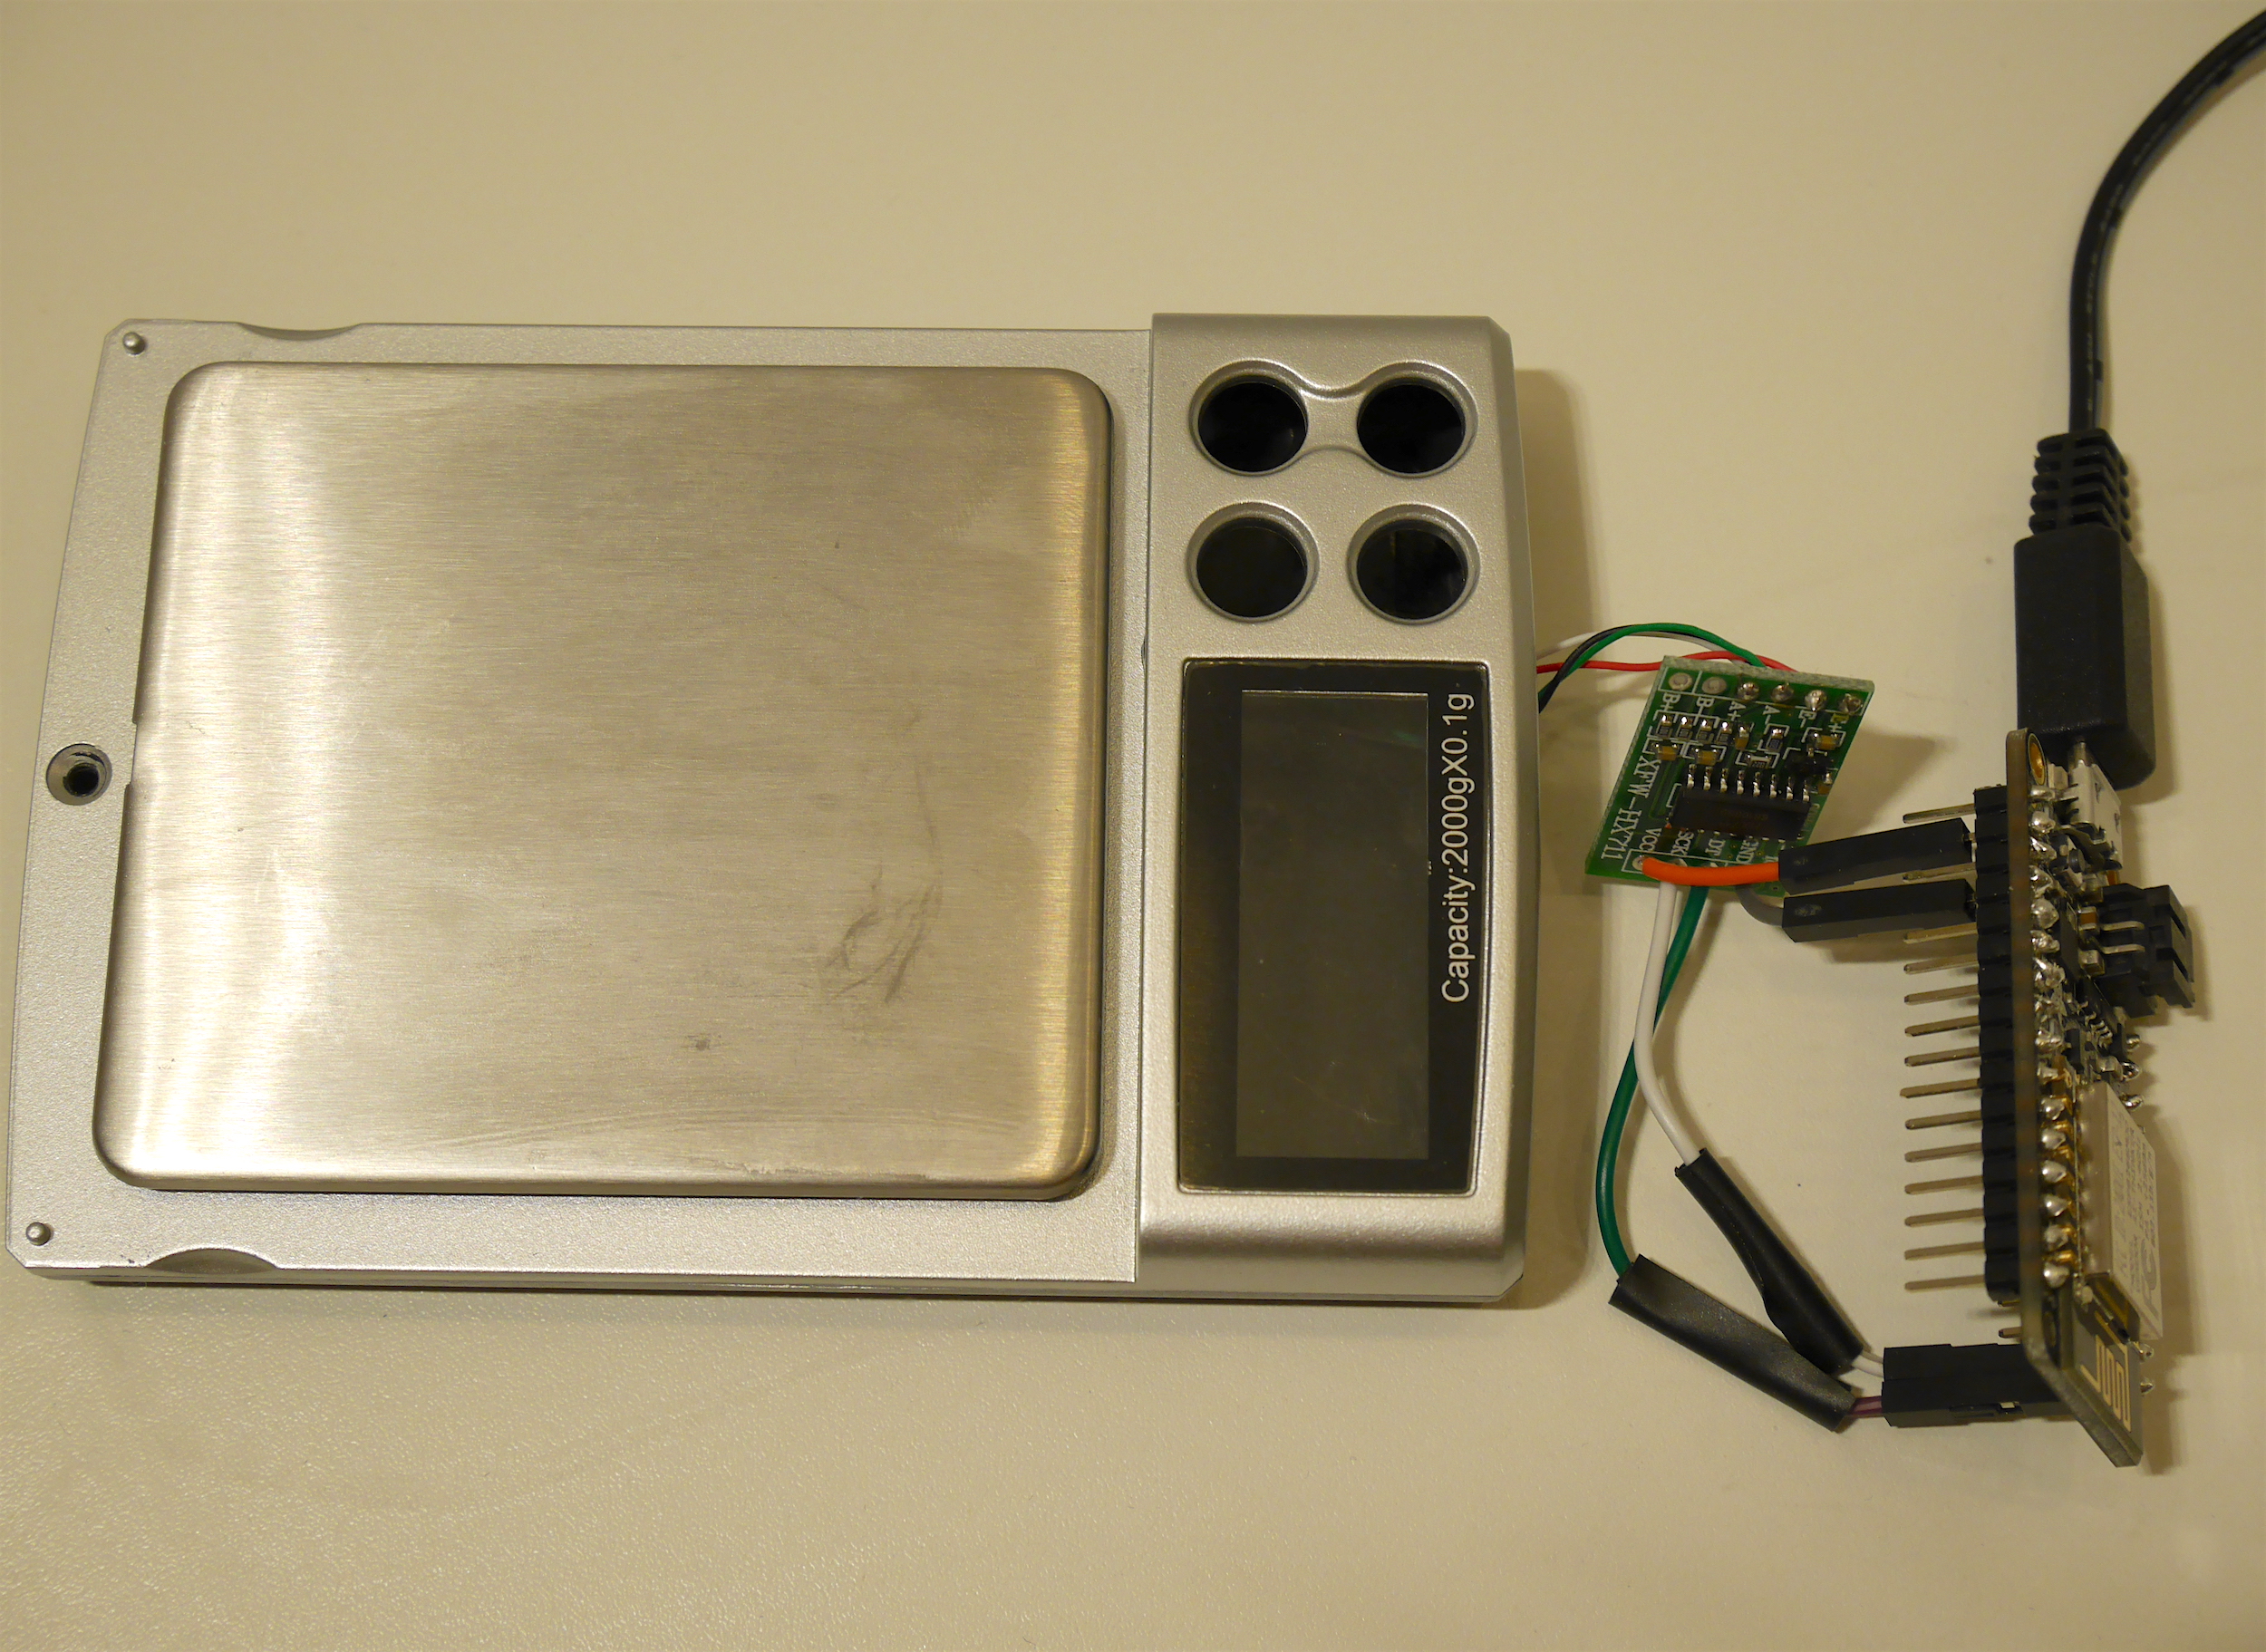
We then connected the 4 wires from the load cell bar to the HX711 and connected the HX711 to our Arduino Uno. Here’s the setup:
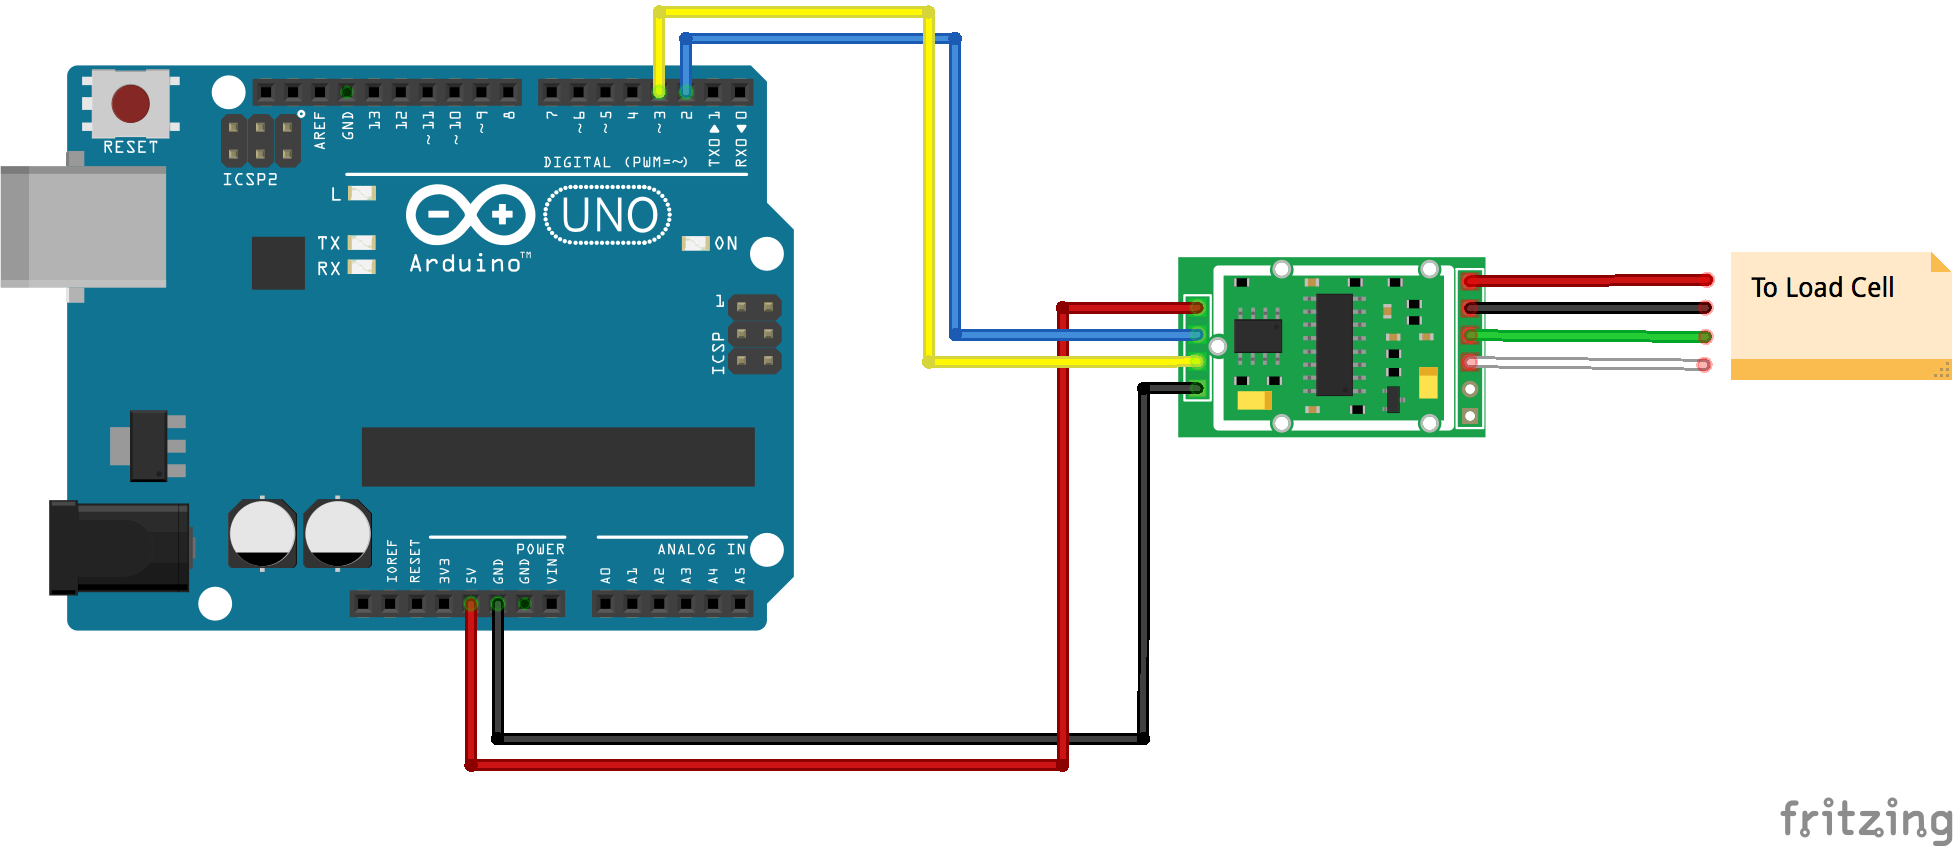 We wired the Arduino digital pin 2 to HX711 CLK and Arduino digital pin 3 to HX711 DOUT. Then on the other side have HX711 E+ to the load cell’s red wire, E- to the load cell’s black wire, and then the A- and A+ to the load cell’s white and green wires respectively.
The Code
Now that everything is connected we can start reading the weight values. The code used in this project can be found here on GitHub. The code is based on the example code from SparkFun Electronics for HX711, and uses this HX711 library. We first installed the HX711 library by downloading the zip file from the GitHub repository and then unzipping it and adding it in the libraries folder of the Arduino IDE.
Before we read the values from the scale we first had to first “calibrate” the scale by finding the right calibration factor. We’ve done this using this Scale_Calibration sketch. We ran the sketch without any object on the scale and then placed an object with a known weight (we used another scale for this) and then sent a or z messages in the Serial Monitor to get to the right weight and thus find the corresponding calibration factor. We placed a few objects with different weights to find the best calibration factor.
Next step was to take that calibration factor and use it when reading values from the scale. This is done by the Scale_Readings sketch.
The Wi-Fi
To make this setup Wi-Fi connected, you can add a Wi-Fi shield for the Arduino, or use another board. We used the Adafruit Feather Huzzah ESP8266.
Here’s the new setup:
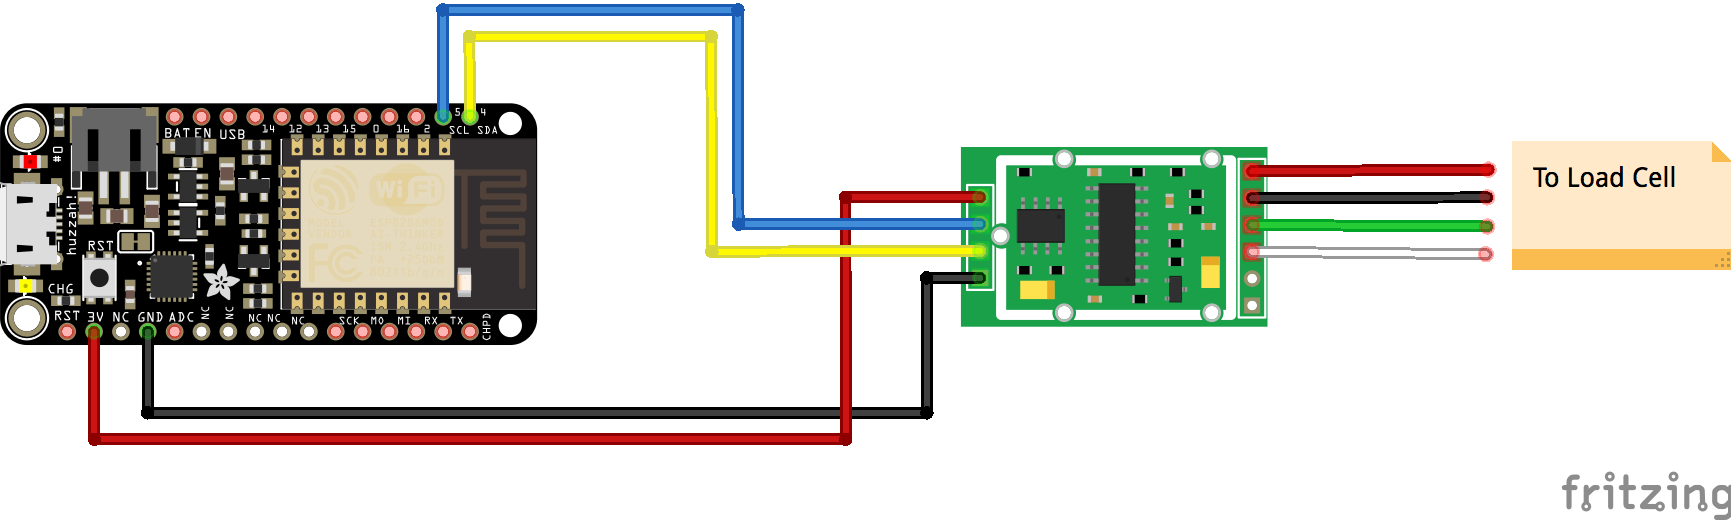
We wired Huzzah’s SCL pin to HX711 CLK and SDA pin to HX711 DOUT. On the other side (from the HX711 to the load cell) we kept the same setup.
To test that we can read the scale values we can use the same Arduino Sketches as before just my making sure to change the lines of code where the board specific setup is made (the pin numbers and baud rate).
If you look carefully at the images you will see that we actually also changed the scale to one having a larger weighting capacity. In the process, we also changed the calibration factor to match with the new scale.
And now, finally, after all the calibration and testing, we can connect the scale to the Wi-Fi! We used Adafruit IO as the service to which we can periodically send the scale weight readings through MQTT. Our GitHub repo contains a sketch showing how to connect to the Wi-Fi and send the reading from the scale periodically to Adafruit IO. The code is based on Adafruit MQTT Library ESP8266 Example.
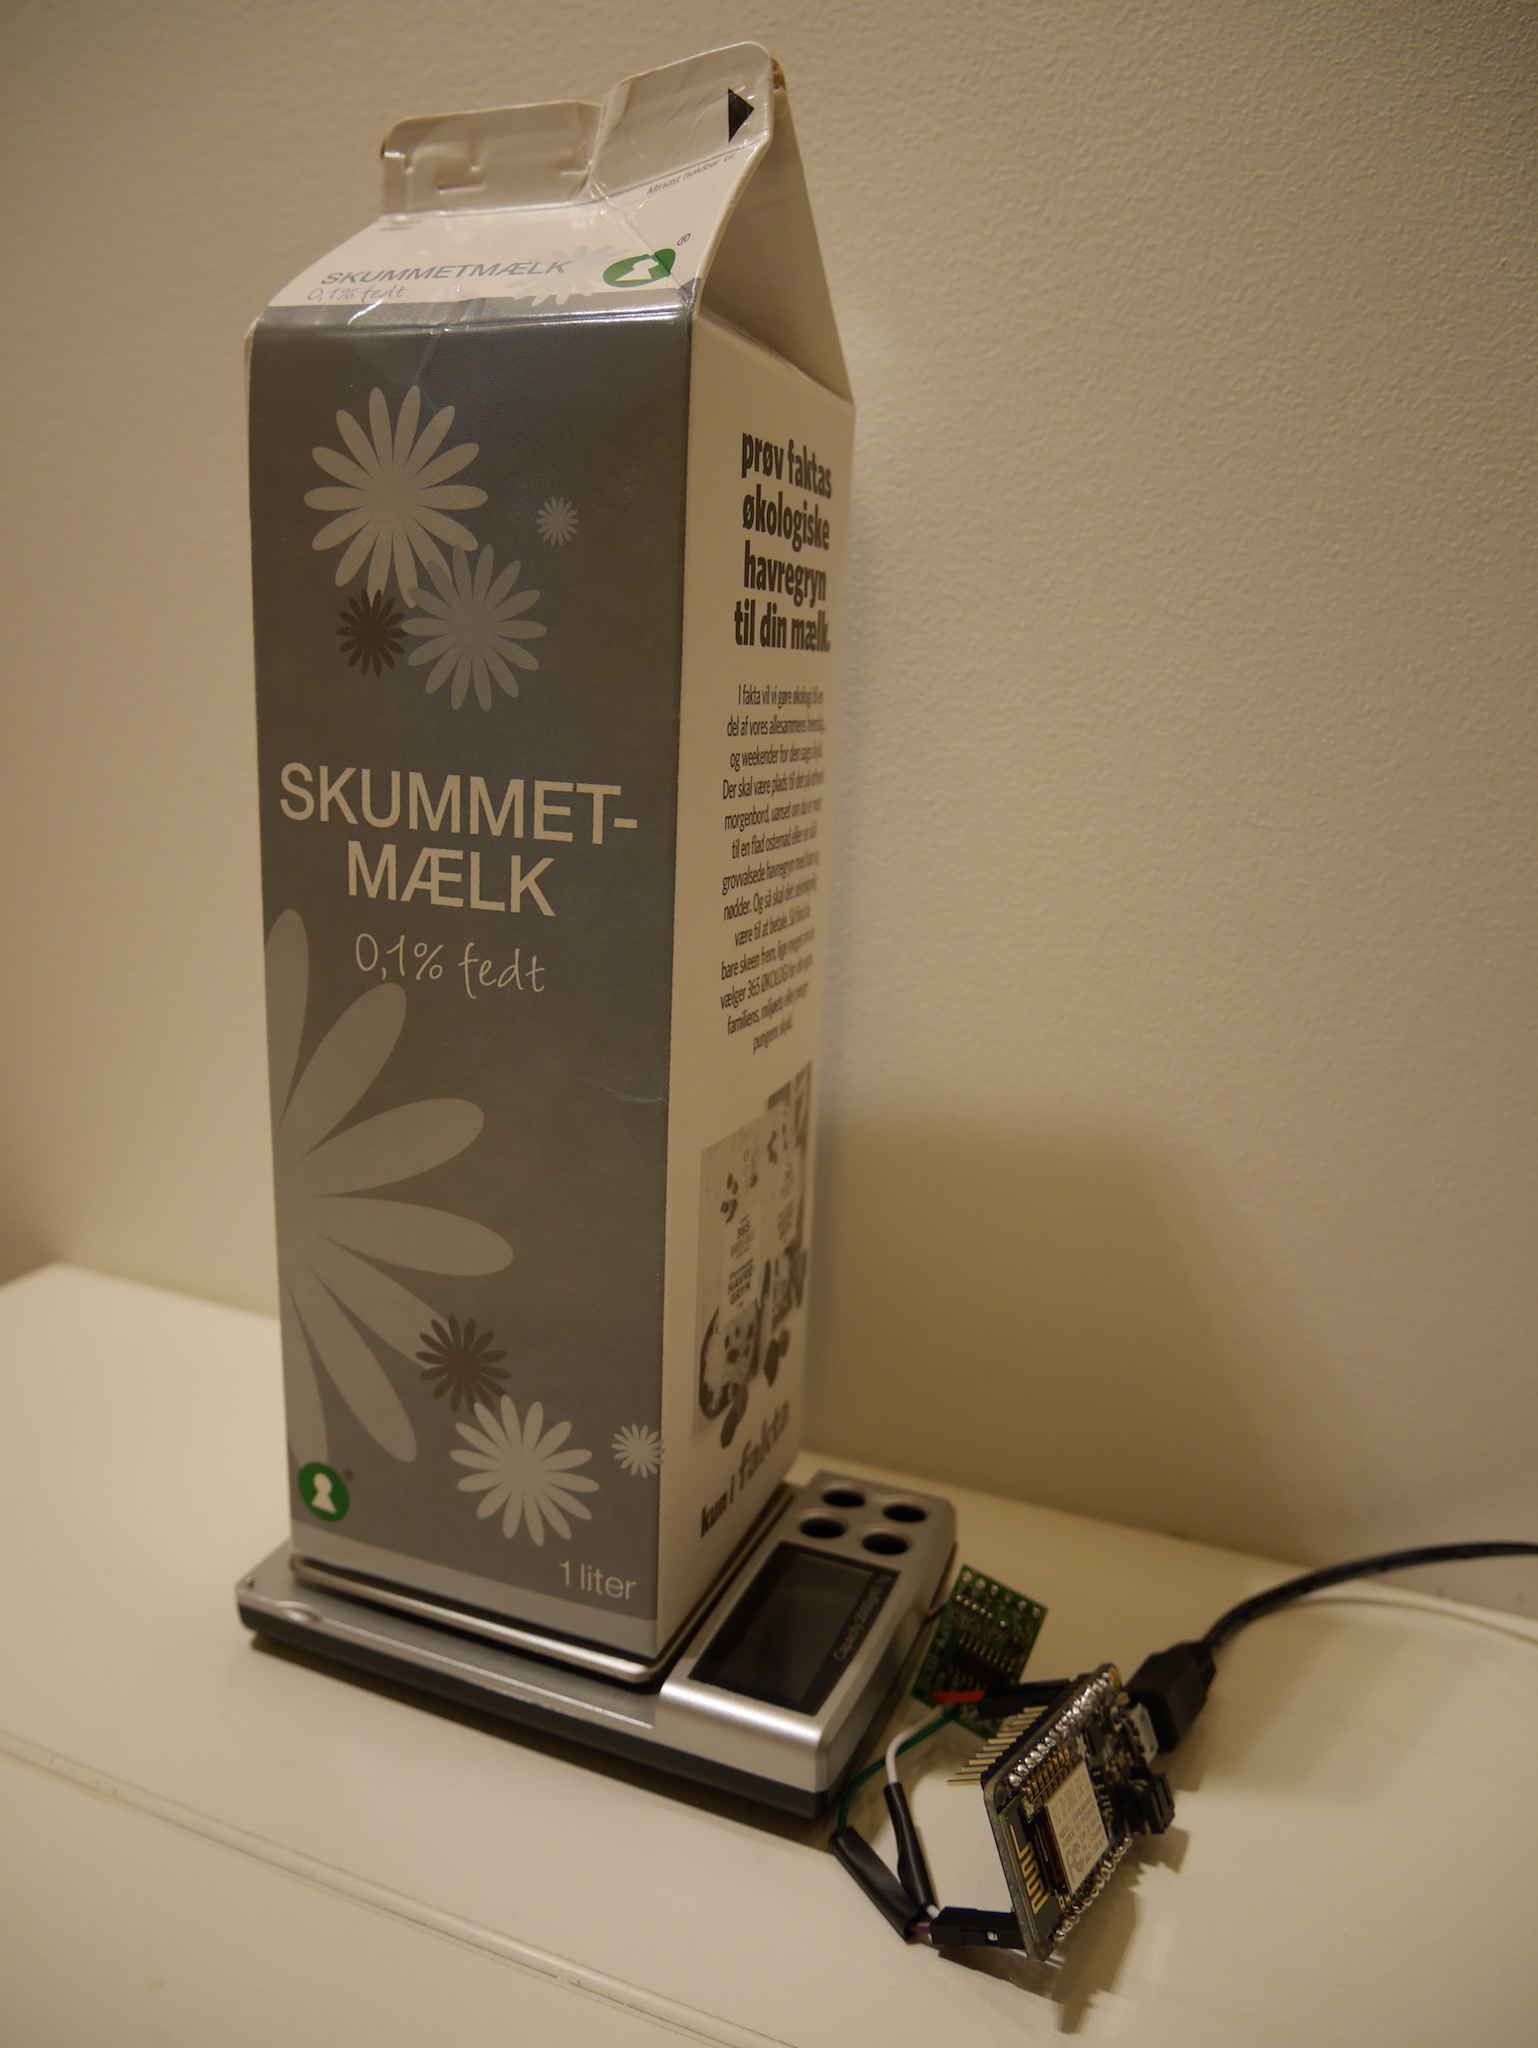
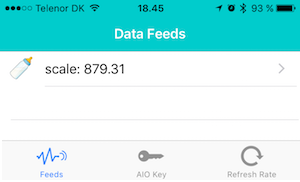
And if you use our free iOS and tvOS DataFeeds app that can be used to monitor your Adafruit IO feeds, then you can check how much milk you have in your fridge while on the move or on the couch!
The Final Bill of Materials
The total cost of building the scale was around 25$. Here’s the bill of materials (BOM):
| Item | Est. Price | Description |
|---|---|---|
| 1 x Kitchen Scale | ~5-10$ | A standard kitchen scale from the local store or from online shops such as Amazon or AliExpress (the online shops usually provide more options in terms of sizes and weight ranges). Here’s for example one from Amazon that is similar to what we bought: Kasio Pocket Scale |
| 1 x Adafruit Feather HUZZAH with ESP8266 WiFi | 15.95$ | Pretty small development board with built-in WiFi and smarts from Adafruit. Can also buy with Amazon Prime |
| 1 x HX711 | up to 7$ | Is needed in order to convert the signal from the scale so the values make sense when you read them. Price varies depending on shop. Can buy 1 |
| 1 x Power supply | ~5$ | The Huzzah can be powered using a micro USB cable. Alternatively, can use a Lithium Ion Polymer Battery. |
| Wires | ~1$ | A bunch of wires to connect the Load Cell from the scale to the HX711 and the HX711 to the Huzzah. Dupont wires are good when prototyping (and don’t want to solder the Huzzah to this project for good). |
Just a side note. While we are not depending on any income from this blog, we do accept donations, and if you are building this project, we would appreciate if you would use our affiliate links when buying components. Thanks!
Load Cell Bar vs Force Sensitive Resistors (FSRs)
In a previous post we shared our findings on using Force Sensitive Resistors for a smart weight scale. However what we found out was that while these sensors can be used to detect presence, they cannot be used to accurately tell us how much weight is applied. It is therefore that we started using the load cell bars, and are pretty satisfied with the results.
The Next Step
Now that the prototype works nicely we are missing a cool enclosure. We are thinking of 3D printing one – that will be a new adventure.
On the software side, we would like to be able to configure on the fly how often we should send the data. If we want to monitor the milk in the fridge we don’t need to send the data each minute. However, if we want to use the same scale to track how fast we drink a beer, we might want to do just that!