sQuiz - Quiz Game with Sound Sensors
Buttons are pretty common in quiz games and are also easy to work with as input to a project. However, to make the quiz game more interesting, it was decided that some squeak toys should be used instead. The participants would have to squeeze the toys, resulting in all kinds of high pitched sounds. This is a weekend project that uses sounds sensors in a quiz game to identify which team answered first.
Materials
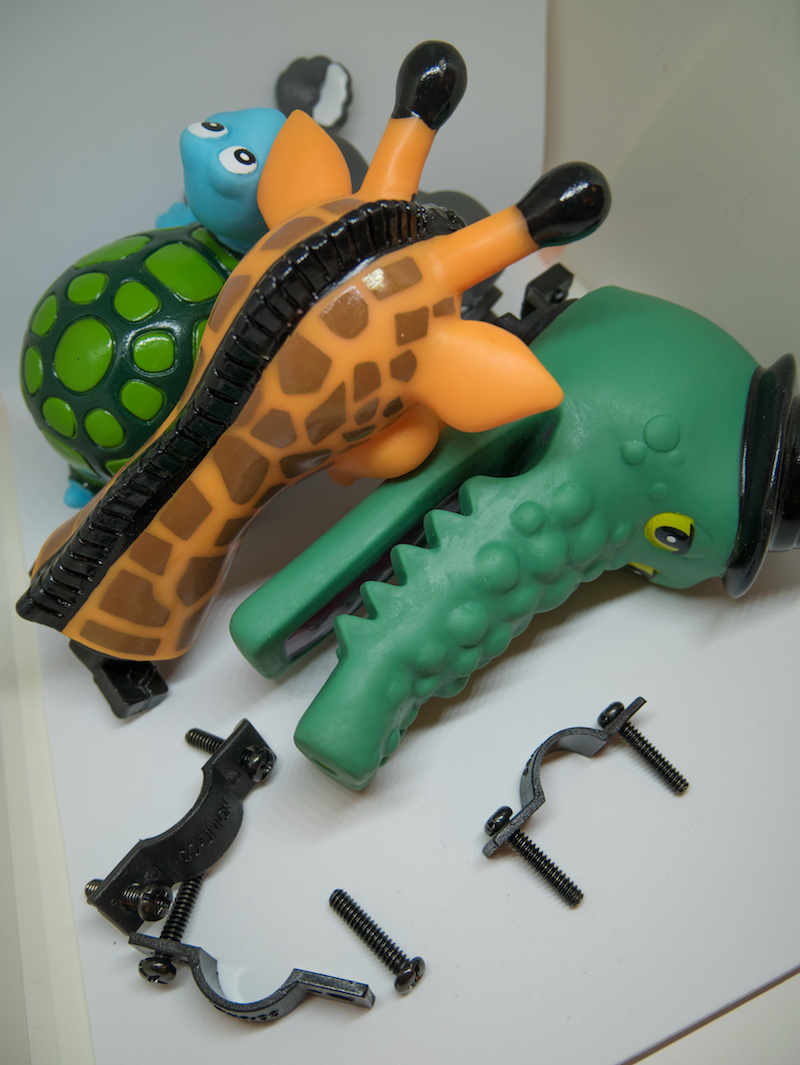
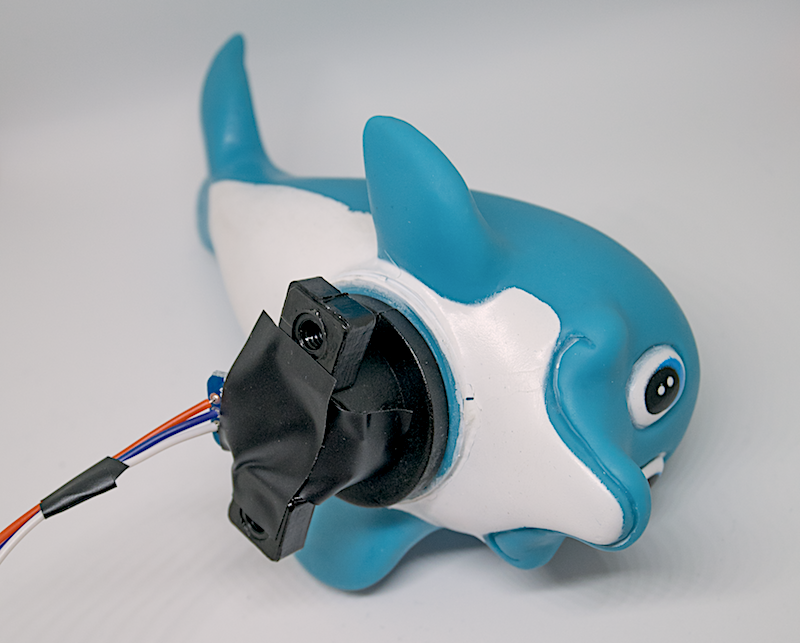
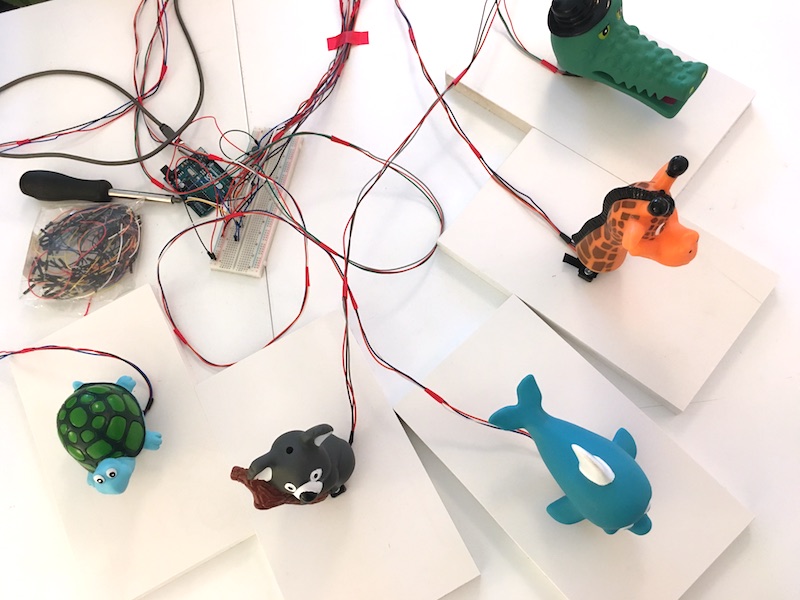
The squeak toys represent 5 different animals and are fitted with pieces of metal that are intended for placement on bike horns.
Given that the toys are going to be squeezed, we initially thought that in order to identify when a team answers using one of the toys we could use buttons or pressure sensors (such as FSRs). However, given the size of the toys it would be difficult to anticipate where to place such buttons or pressure sensors on the toy so we can ensure that we capture the input in the heat of the game.
We haven’t experimented with sound sensors before, but this seemed like a good project to give them a try. We would place one sound sensor on each of the toys, and connect this to an Arduino to read the values constantly. A person would read out loud the quiz question and then the teams would squeeze the toys to get a chance to answer. The values read from the sound sensors would then be able to tell who squeezed first.
Here’s the bill of materials (BOM) for the hardware (excludes the 5 toys and a computer to which the Arduino is to be connected to show the results). Note that we also added a button so that we can “freeze” the data collection and have time to interpret the data (when multiple teams squeeze and we need to decide which was first).
| Item | Est. Price | Description |
|---|---|---|
| 5 x MAX4466 |
5x7.9$ | This is the sound sensor (microphone). One sensor per toy will be needed. A product description is available at Adafruit. |
| 1 x Arduino Uno |
18$ | This is the brain of the project (and a good investment for future projects). |
| 1 x Button & 10K ohm resistor | <1$ | A button to control the sensors data collection. We bought a bunch of buttons and so we had some around to choose from, but for example these buttons on Amazon |
| long wires | ~5$ | The amount of wires will depend on how far away the toys (teams) will be from each other. We used around 15 x 1.5 meters of wire that we had around. If you don’t have so many wires, this wire kit from Amazon |
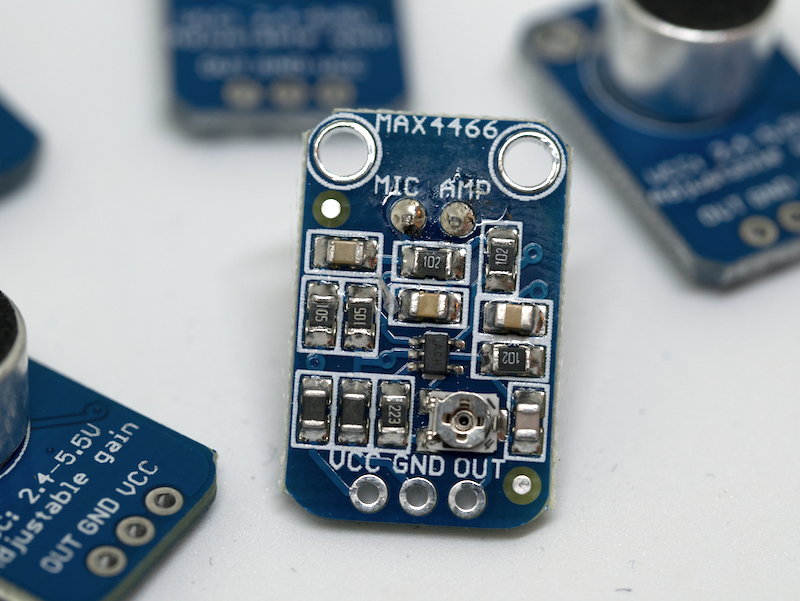
We used five MAX4466 electret michropone amplifiers:
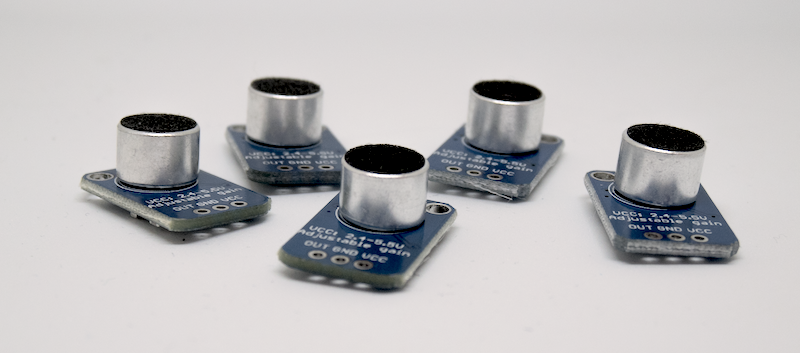
They are pretty easy to work with (check out this Adafruit tutorial). The sensors have only 3 connections: VCC, GND and OUT.
Assembly
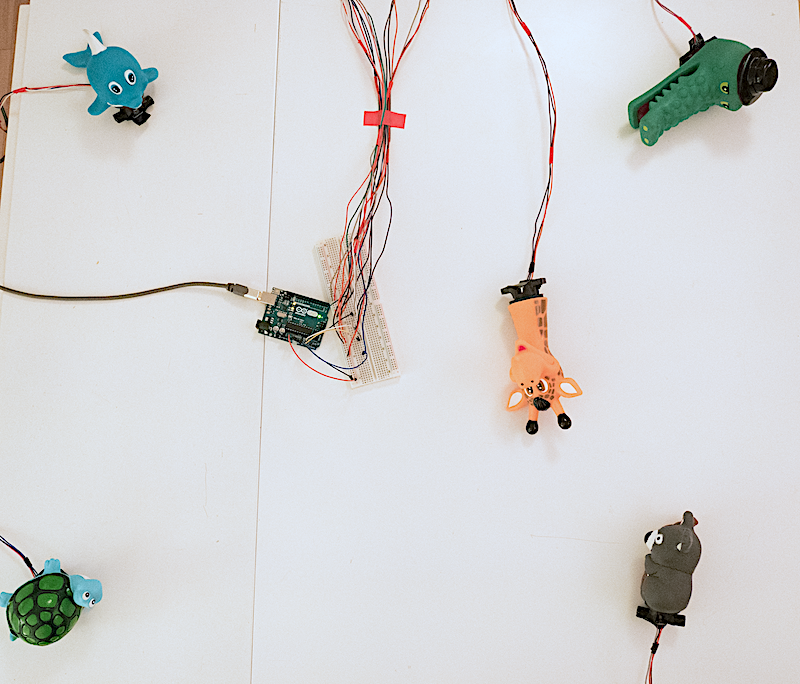
Here’s the hardware setup:
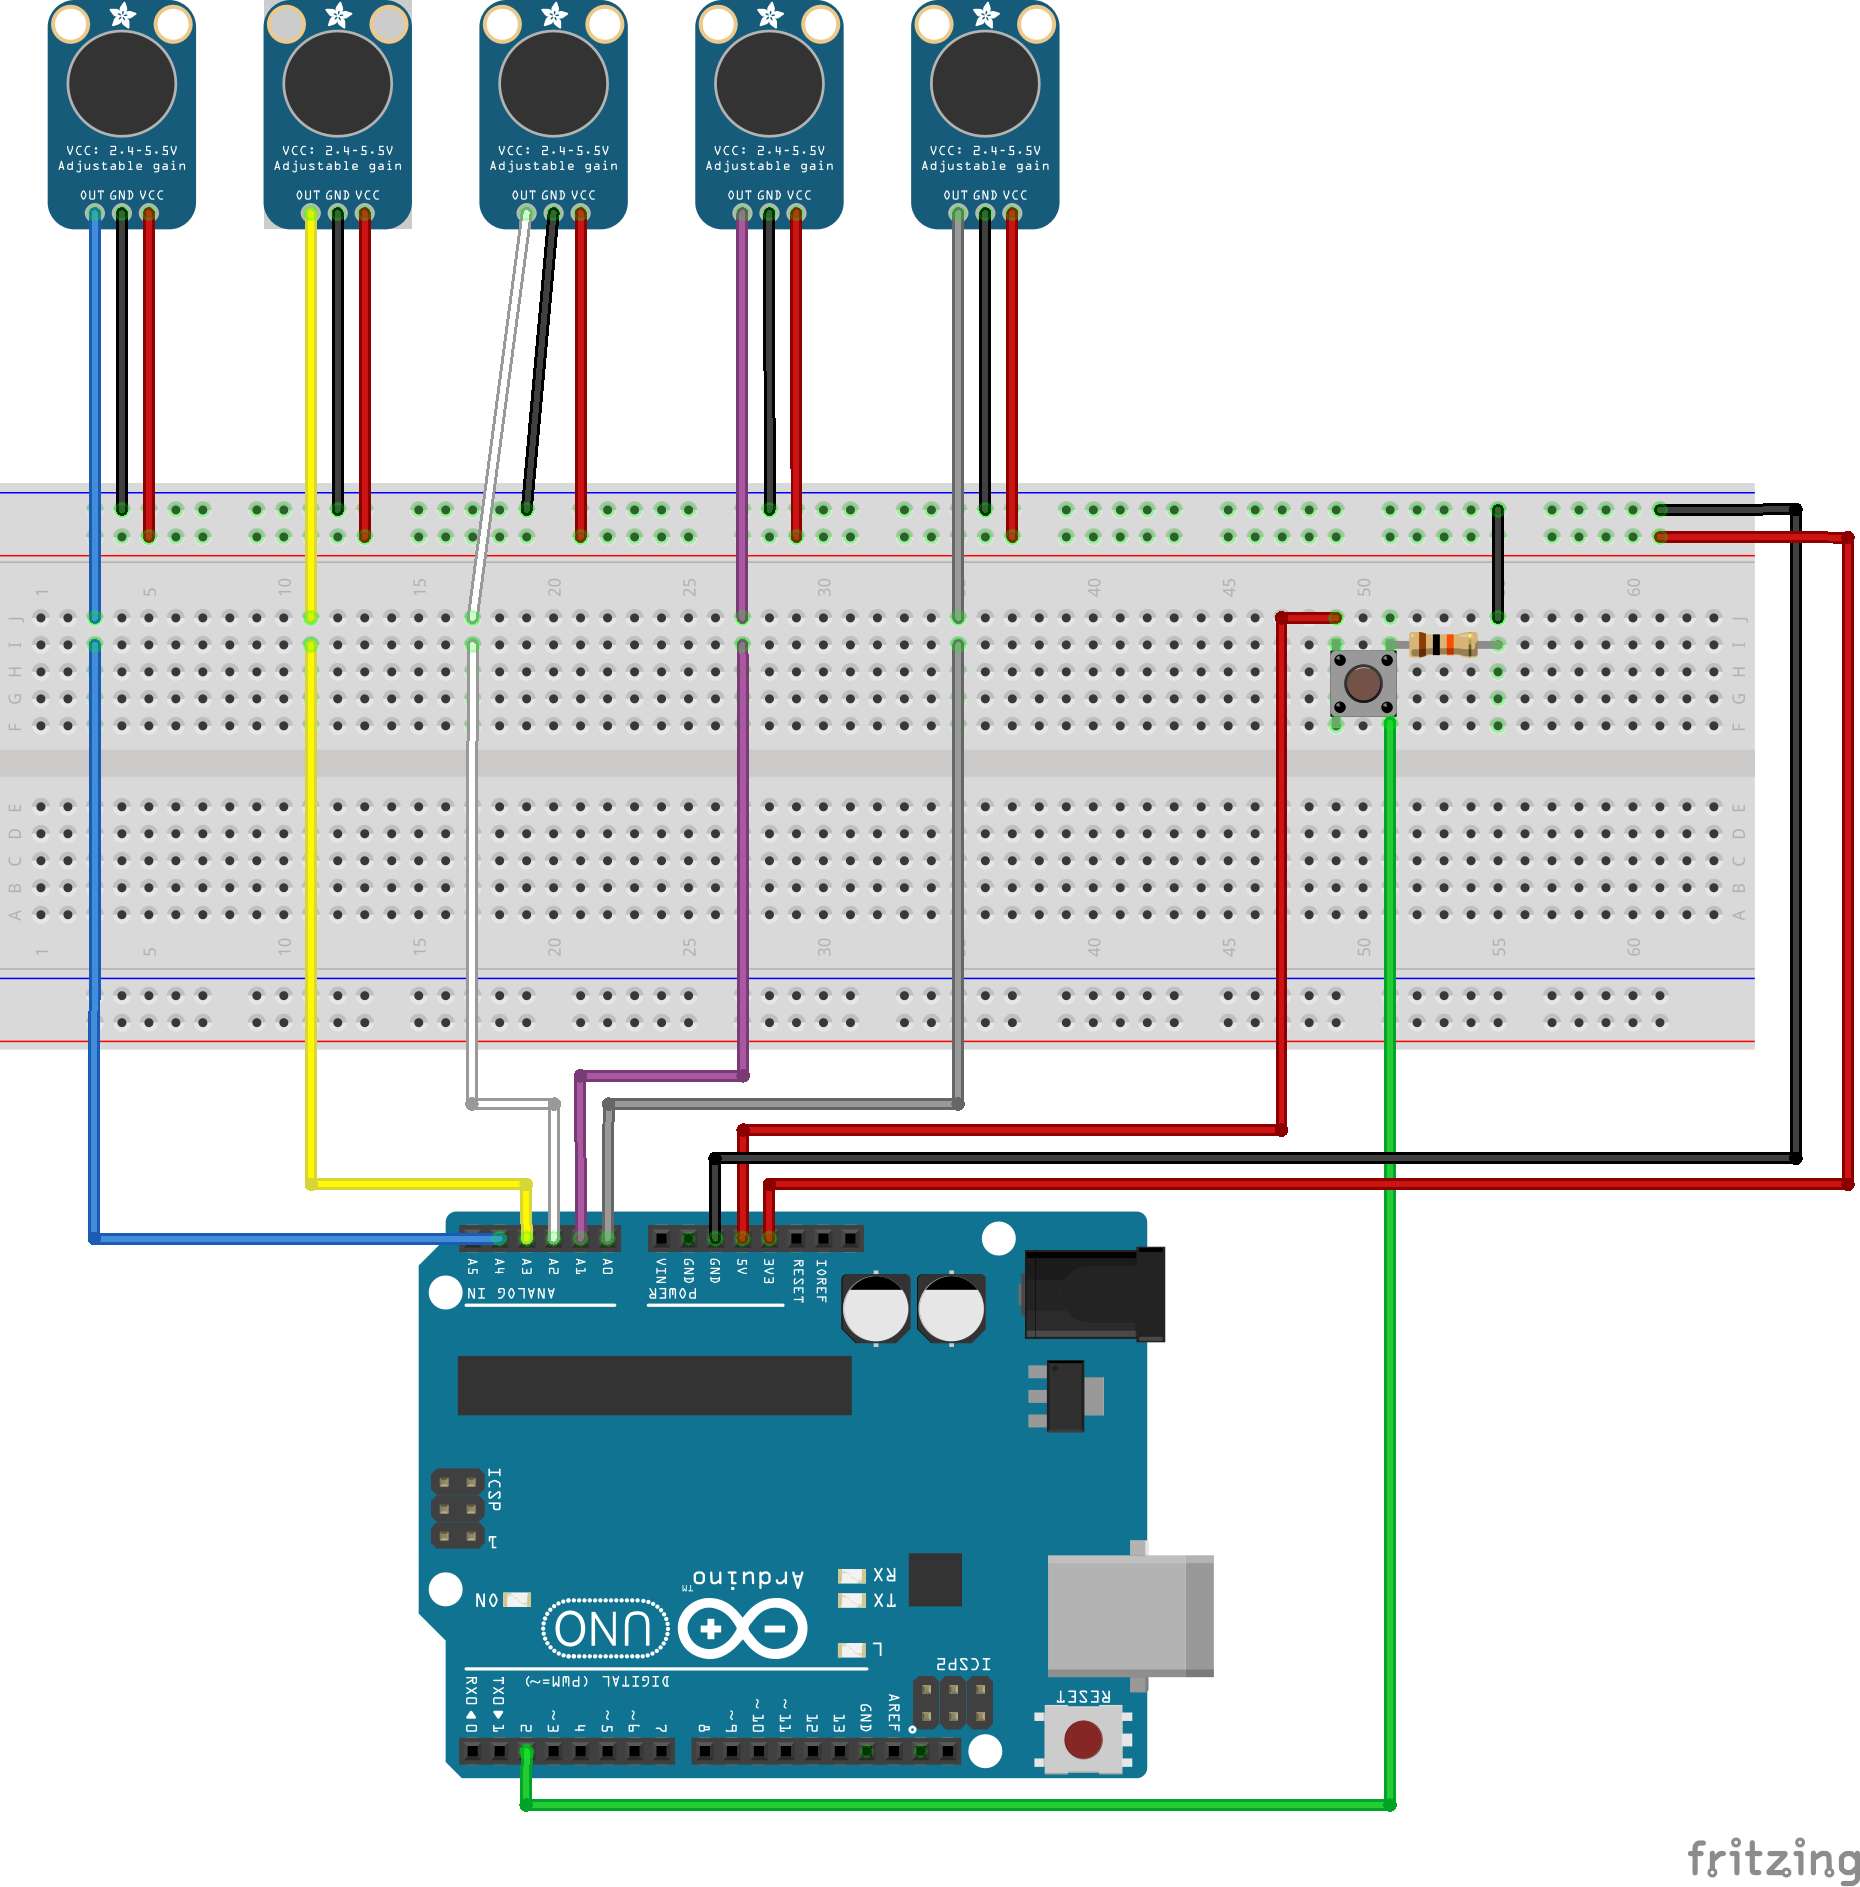
To each of the MAX4466 we solder wires connecting the sensor to the Arduino.

Then we add the sensor under the belly of each animal toy and fix it in place with some tape.
In the end there will be a network of wires going from the Arduino to the toys. We used tape to keep the long wires in place.
The sQuiz Game
The code used in this project is available on GitHub.
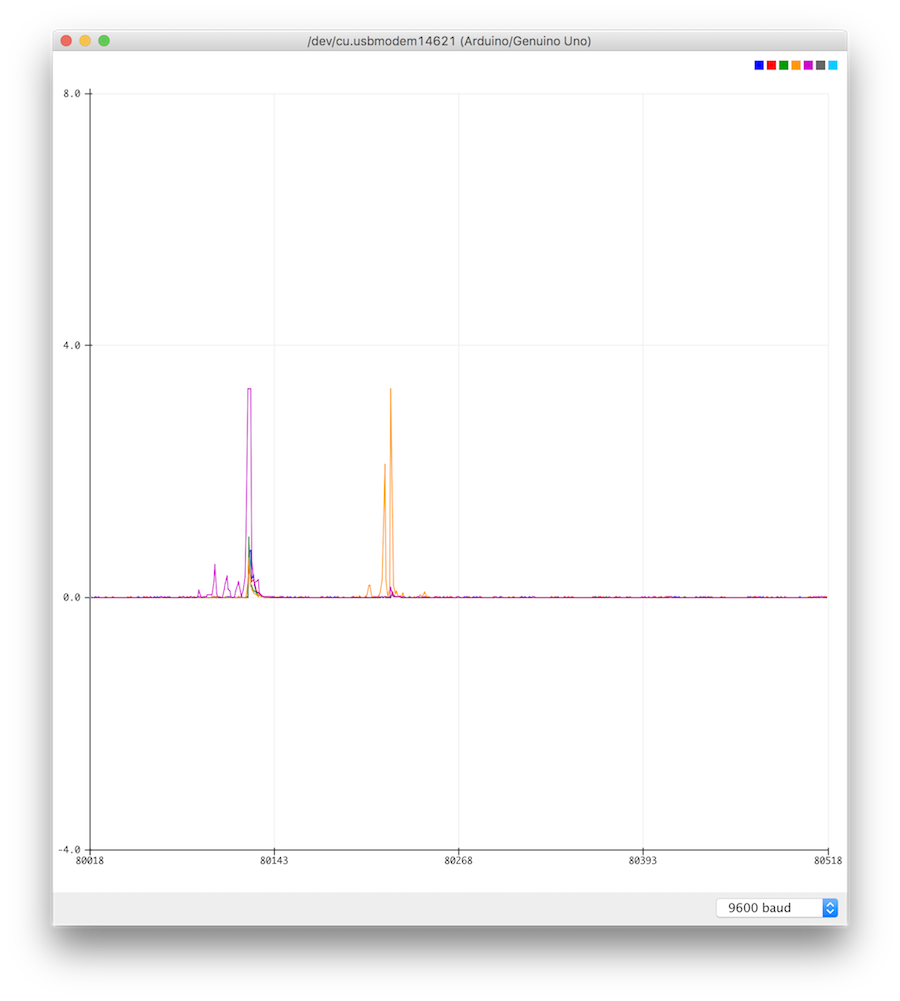
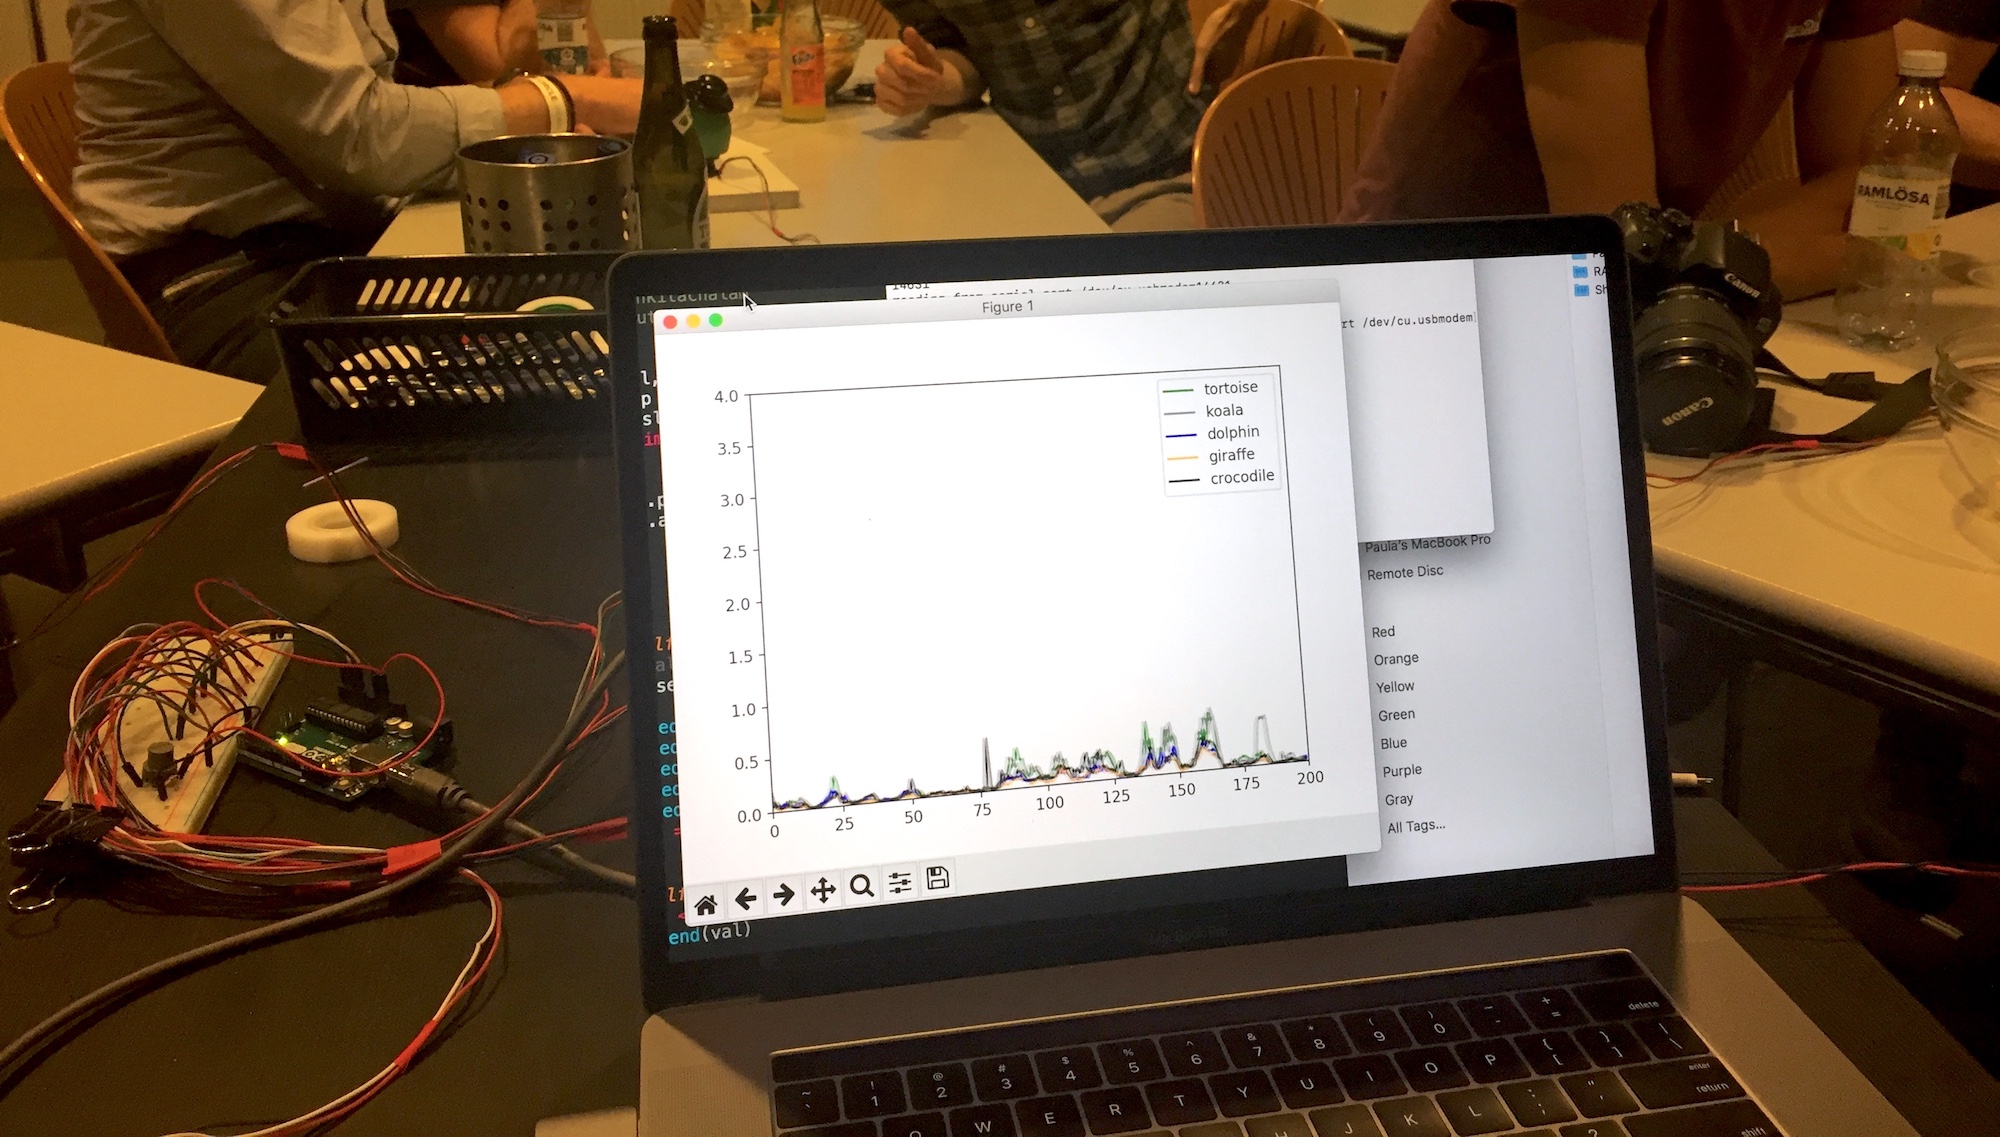
In the Arduino sketch we loop through the values from all sound sensors and print them to the serial. When the button is pressed, it will print “save” on serial and will stop reading values until the button is pressed again. The output from the Serial Plotter in the Arduino IDE would look like this:
However, we wanted a bit more flexibility in plotting the data (including some help in remembering which color corresponds to which toy), so we used Python and Matplotlib, and modified the Python script from a blog post on Plotting read-time data from Arduino using Python from Electronut.in. We adapted the code to read 5 sensor values, add a legend with the name of the animal toys and their color, and to capture a picture when the “save” string is sent on the serial port (sent when the button is pressed). This is how the saved figure looks like:
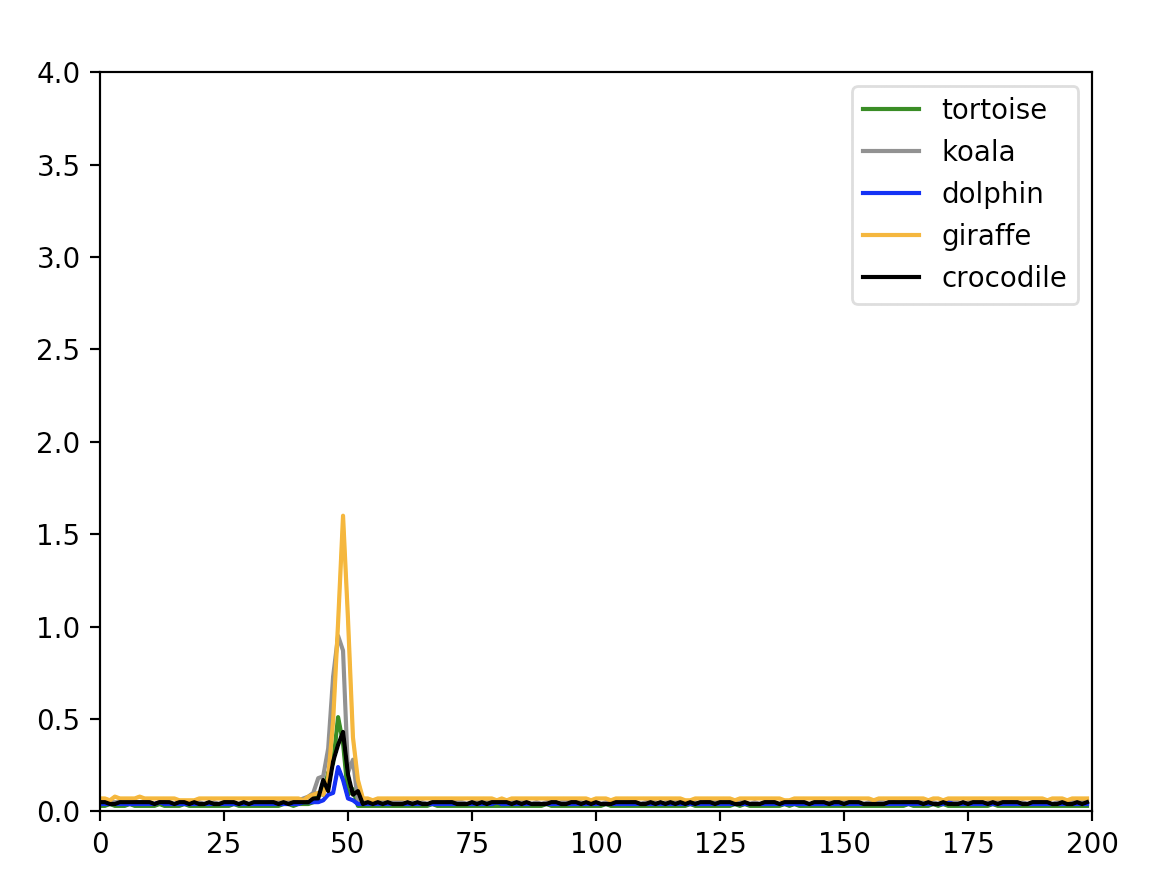
The gain can be adjusted on the MAX4466 sensors using a screwdriver, to adapt to the level of sound generated from each of the toys. We were satisfied with the initial results, so we did not end up changing the gain in this project.
A note if you are trying this project. Due to the high pitched sounds, testing can be difficult at times when your neighbors might be sleeping. We tried to keep it quiet despite lots of excitement. We did not get any complains from our neighbors (yet).
Results
After being satisfied with the test results, we fixed the toys on wood pieces with the same screws that came with the toys (remember, they were designed for bike horns).
The setup worked excellent during the quiz session, the participants had fun, and the winning team got to keep the toys!
(We kept the sensors.)