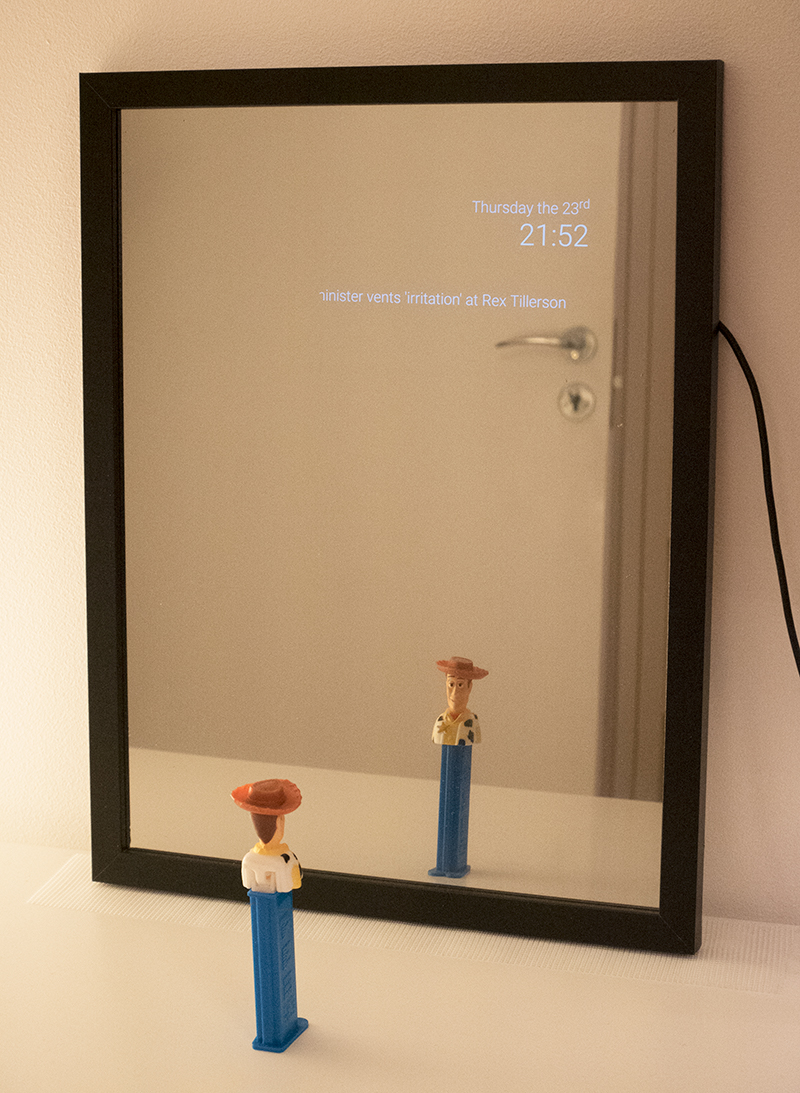
The Mirror Assistant - The First Version of Our Smart Mirror
Brushing teeth in the morning just got better! A smart mirror can tell time, weather, news and more. This is our first prototype of a smart mirror, and we believe it is amongst the simplest and cheapest methods of building a smart mirror.
Background
A smart mirror can be loosely defined as a mirror that is able to display information or allows for some kind of interaction, for example by voice, touch or hand-gestures. Many of the home-built smart mirrors are powered either by a Raspberry Pi or an Android tablet. Common use cases are presenting time, weather forecast, latest news, traffic information, calendars, and any other information that can improve the routine of getting up in the morning and/or preparing to go out.
There are many smart mirrors DIY projects shared over the internet (check this Pinterest board cataloging some of them), and the interest in smart mirrors has clearly increased over time. Here is Google’s trend analysis of the search term “smart mirror” from 2004 until now, measured in percentage of interest over time relative to the highest point of interest:
There is also clearly some interest in making a business in this area. There have been several crowdfunding project initiaves (like Perseus, DoodleVU, SmartMirror, Selfiemirror), but we can’t yet buy a smart mirror from a store. Trends are followed of course by internet domains. Many domains based on “smart mirror” or “magic mirror” are already taken, but products are not available yet (for example: magicmirrors.dk).
It will be interesting to see how the market for smart mirrors will be developing in the future, but as the perfect smart mirror is not available yet to buy, we set out to build one. We will guide you how to build your own in the rest of this article.
Components
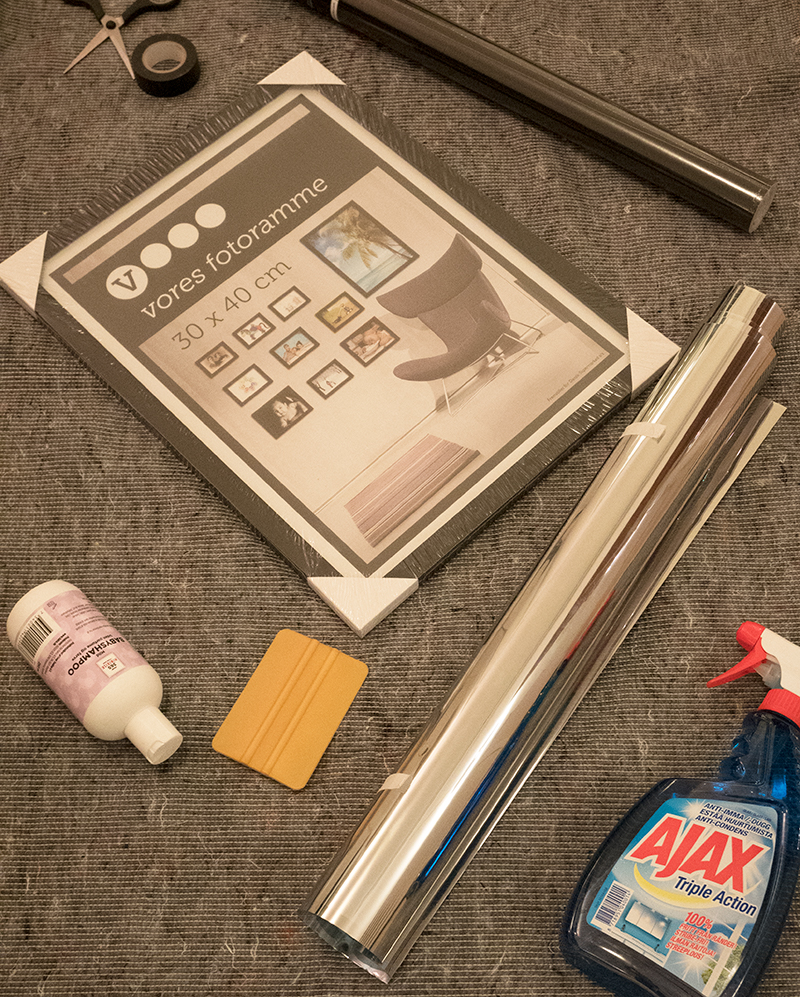
We used an old Asus Nexus 7 tablet as the computational power for the mirror. A new tablet with similar capabilities would cost around 40$. The total cost of building the mirror was around 20$ (excluding the tablet that we already had lying around). Here’s the bill of materials (BOM):
| Item | Est. Price | Description |
|---|---|---|
| 1 x Mirror Film Sheet | from 5$ | These sheets are usually marketed as privacy films for windows. We bought our mirror film from AliExpress but this One Way Mirror Film |
| 1 x Frame with glass | 14$ | We could have bought the glass separately and built the frame, but we took advantage that these two materials are usually put together as picture frames, so we bought ours at our local supermarket. You can find several on Amazon, for example this Black Frame |
| 1 x Black paper | 1$ | Is needed in order to cover the back of the glass to ensure that you get the mirror effect. We bought a roll of black giftwrap paper, and used less than 1 meter from it for this project. |
| 1 x Android tablet with power supply | 0$ - 60$ | The price depends on whether you already have a tablet around or if you want a new one, and with what specifications. The 7” Amazon Fire Tablet |
| Black tape, scissors, cutter, glass cleaner spray, squeegee, baby shampoo mixed with water in a spray bottle | 0$ - 10$ | These are needed for putting the components together. The squeegee and the extra spray bottle with the shampoo mix can be bought as part of a Window Film Application Tool Kit |
Method
Prerequisites
- Find a suitable dust-free work area and have all the materials within reach.
Step 1: Add the mirror film sheet on the glass
- Take the glass out of the picture frame and clean it with glass/window cleaner spray.
- Make a mix of baby shampoo and water and put it in a spray bottle. Or use the spray from the Application Kit if you bought one.
- Cut the mirror film sheet to the size of the glass plus 1-2 extra centimeters.
- Spray the glass with the shampoo mix.
- Add two pieces of tape, one on each side of one of the corners of the film sheet. This will make it easier to take out the protective sheet from the actual sticky film.
- Separate the protective sheet from the sticky film and add it on the glass.
- Spray some shampoo mix over the film.
- Using a squeegee, remove the air bubbles starting from the middle and going towards the sides.
- Then use a cutter to cut the extra foil on the sides of the mirror.
There are many videos on how to apply the film on windows or glass, so you can just search for “How to apply window film” for inspiration.
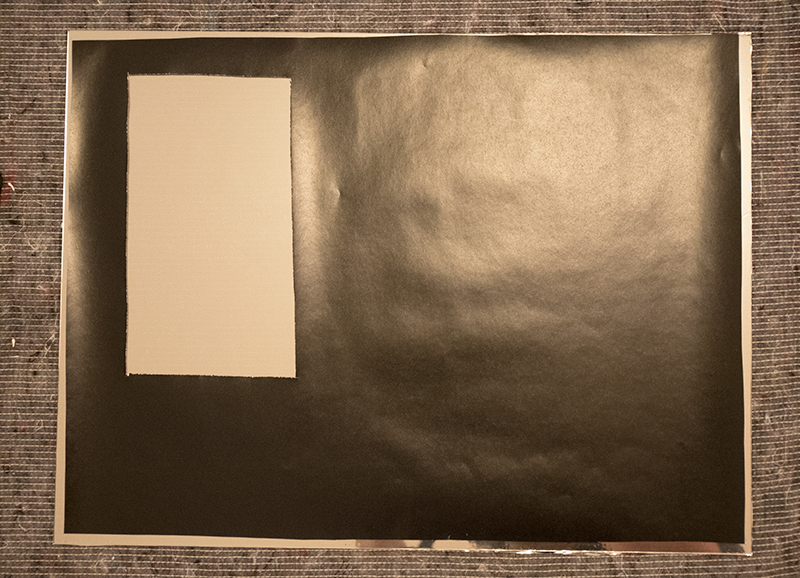
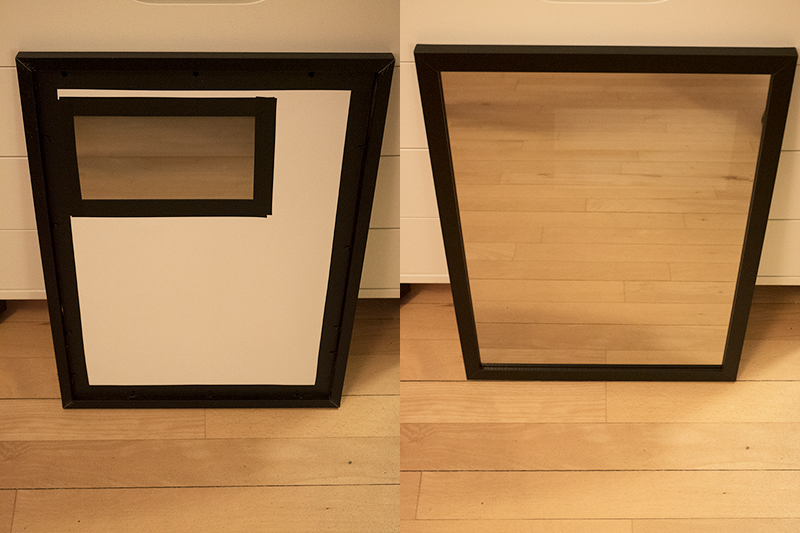
Step 2: Add the black paper on the back of the glass
- Turn the mirror around, with the side where you applied the film down.
- Cut a sheet of black paper to the size of the mirror, leaving some space on the sides for the tape.
- Measure where the tablet will be positioned (recommended to be in a corner as to not interfere too much with the normal mirror usage) and trace some guide lines over the paper.
- Cut the paper in the area where the tablet will be placed:
- Then tape the paper onto the glass:
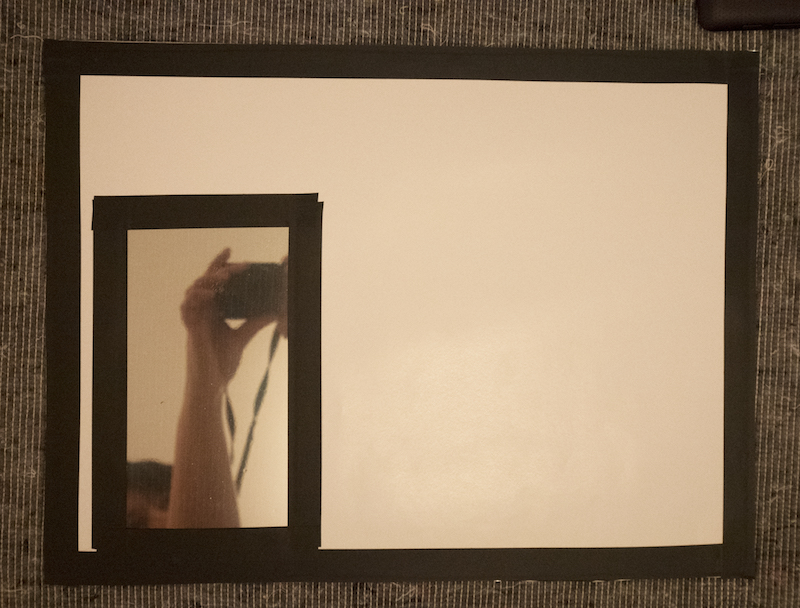
- The result (back and front):
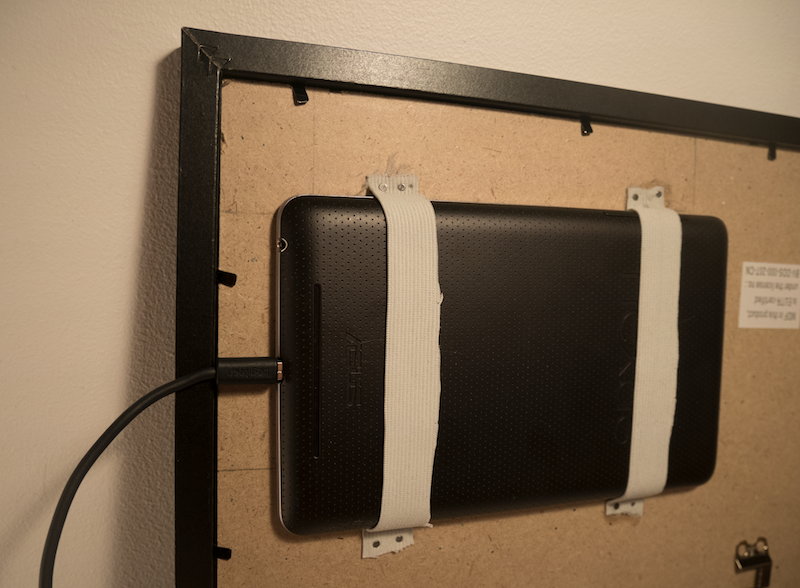
Step 3: Add the tablet to the back of the mirror
- Install the Home Mirror app from the Play Store.

- Open and configure with your preferences. Launch as full screen.
- To hold the tablet in place you have several options.
- You can simply tape the tablet to the paper, but then it will be very difficult to take it out.
- An alternative is to use some elastic to keep the tablet in place while offering the flexibility of being able to take the tablet out for maintenance when needed. We used the back of the picture frame, which was made from a cardboard-like material. We cut out the area needed for the tablet and added some pins to keep two strips of elastic in place.
Final thoughts and next steps
This was a great weekend project, simple to make (both in terms of skills and components needed), and a great use of the old Android tablet that we had sitting in a drawer until this project came to be.
The mirror foil looks better than expected. We had some doubts whether we should even try the mirror foil, but since getting a two-sided mirror was a bit more difficult, we gave it a try. It was the first time we put a foil on the glass and we would probably do better the second time. Clearing the work area from dust and having two people operate the transfer of the foil to the glass can improve the results.
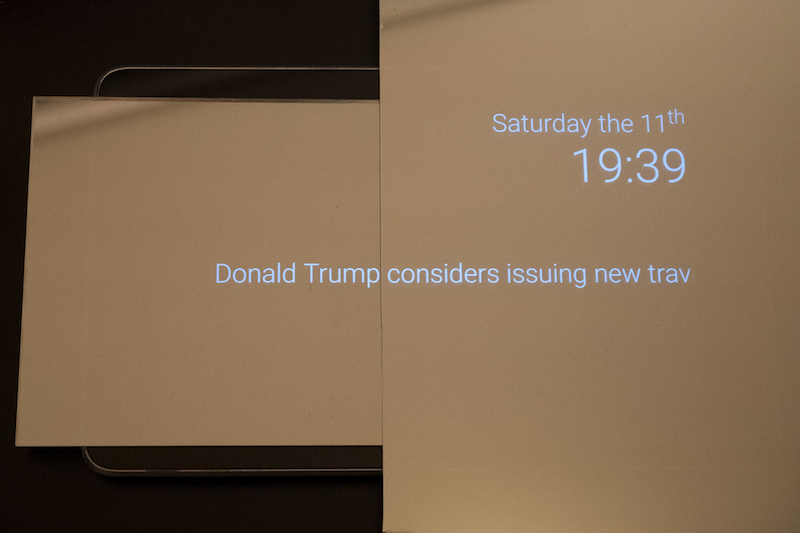
Mirror film vs. two-way mirror
For the next version we would however go with a two-way mirror glass (or acrylic) instead of the mirror foil, to get more clarity in the mirror. The current mirror looks reasonably good and the foil was easier and cheaper to acquire than a two-sided mirror. However, it is not bathroom mirror like quality.
Here are some side-by-side comparisons with a sample of a two-way acrylic on the left and the film based mirror on the right:
Android vs. Raspberry Pi
[UPDATE 04-MAR-2017]: We initially had some issues with keeping the tablet charged at all times, so it would run out of battery when running the dashboard app at full brightness 24 hours a day. After some investigation, we identified that the power supply wasn’t supplying enough current, which we tested with a current and voltage meter. Changing the charging adapter with a better one solved the issue!
There was one thing we did not expect -- the battery of this tablet couldn't handle showing the dashboard app in full-brightness 24 hours a day, so after some time, we would find that the tablet powered itself off. The number of apps installed was set to a minimum and still the continuous power supply was not enough. We reduced the brightness to somewhere around 75% which resulted in having the mirror displaying the dashboard app for more than 24 hours, but it still powered itself off after a while.
Our tablet is more than 3 years old. If you are building the mirror yourself with an old tablet, we recommend that you do a quick test first. Install the Home Mirror app (or another app that you intend to use in the mirror), set the brightness to 100%, leave the app running in full screen mode, and test how much battery is consumed over time.
As for us, we will probably replace the tablet with a Raspberry Pi in the next version of our smart mirror.
Want your own smart mirror?
We can recommend this as a weekend DIY project, and you can use the links above to buy all or some of the components. If you just want your own ready-to-use smart mirror prototype, contact us and we’ll see what we can do.